Microduino Digital tube temperature and humidity meter(DHT11, SHT10, AM2321)
| Language: | English • 中文 |
|---|
Contents[hide]ObjectiveThis tutorial teach you how to use three temperature and humidity sensor, DHT11, SHT10 and AM2321, and use the digital tube to display result. Equipment
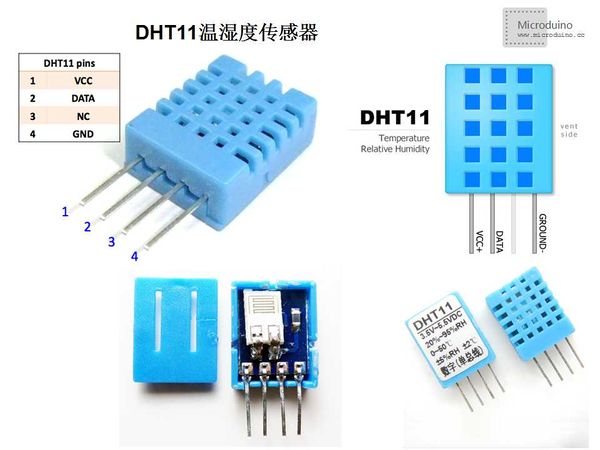
First Experiment (DHT11)DHT11 temperature and humidity sensor: Product overview DHT11 digital temperature and humidity sensor is a compound sensor with calibrated digital signal output. It use dedicated digital module acquisition technology and the temperature and humidity sensor technology, ensure that the product has a very high reliability and excellent long-term stability. Sensor consists of a resistance type moisture element and a NTC temperature measuring element, and connected to a high-performance 8-bit microcontroller. So the product has excellent quality, super fast response, strong anti-interference ability and extremely high performance-price ratio. Every DHT11 sensor in extremely precise humidity calibration laboratory calibration. Calibration factor stored in OTP memory in the form of program, the sensor need invoke these calibration coefficient in the detection model process. Single wire serial interface which make the system integration becomes simple and fast. Super small volume, low power consumption, making it to the class application the best choice for even the most demanding applications. Products for single row pin 4 needle assembly, convenient connection
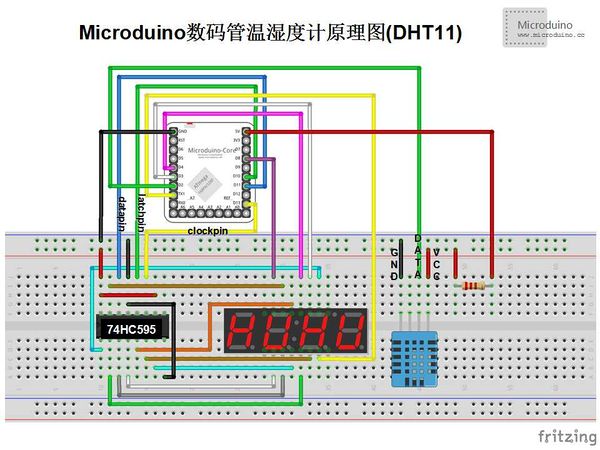
SchematicPin Table:
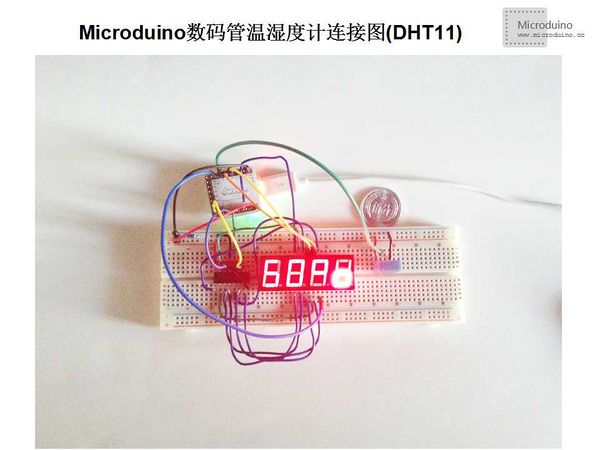
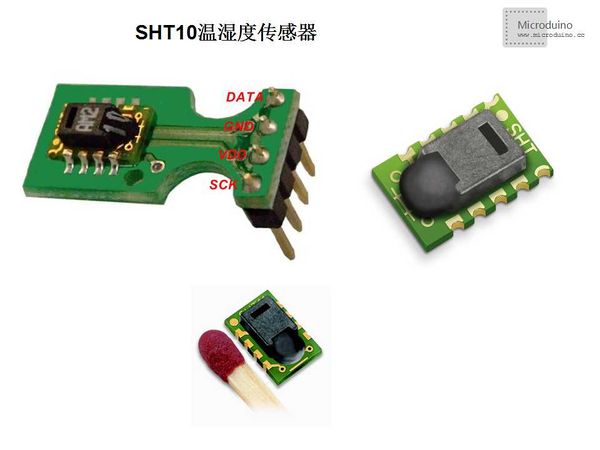
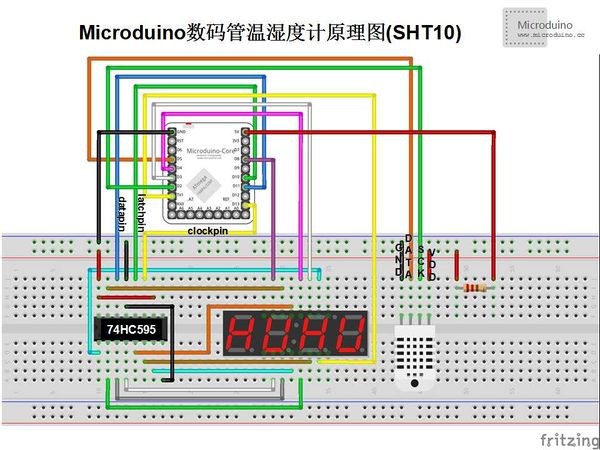
ProgramRefer to DHT11Segments.ino DebugStep 1: Download DHTlib library, uncompress the library to libraries folder of Arduino IDE, then restart IDE. https://github.com/RobTillaart/Arduino/tree/master/libraries/DHTlib Step 2: Copy the code to IDE and compile it. Step 3: Set up the circuit, as follows: Step 4: Download the program and run it. Step 5: Observe the digital tube. Find a hot object to close the temperature sensor or blowing on the sensor, the digital tube will display the result. ResultAfter DHT11 sensor near the heat source, the digital tube displayed value will rise, leave the heat source temperature will gradually reduce. Blowing on the sensor, the number will rise too. Second experiment (SHT10)SHT10 temperature and humidity sensor: Main parameters Humidity measurement range: 0~100%RH; Temperature measurement range: -40~+123.8℃; Humidity measurement precision: ±4.5%RH Temperature measurement precision: ±0.5℃ SchematicPin Tables:
ProgramRefer to SHT10Segments.ino DebugStep 1: Downlaoad SHT10 library, unzip it to libraries folder of Arduino IDE, and then restart IDE. https://github.com/practicalarduino/SHT1x Step 2: Copy the code to IDE and compile it. Step 3: Set up the circuit, as follows: Step 4: Download the program and run it. Step 5: Observe the digital tube. Find a hot object to close the temperature sensor or blowing on the sensor, the digital tube will display the result. ResultAfter SHT10 sensor near the heat source, the digital tube displayed value will rise, leave the heat source temperature will gradually reduce. Blowing on the sensor, the number will rise too.
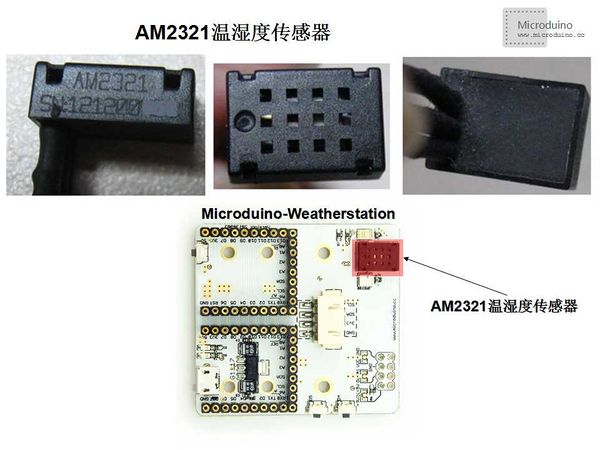
Third Experiment (AM2321)AM2321 temperature and humidity sensor:
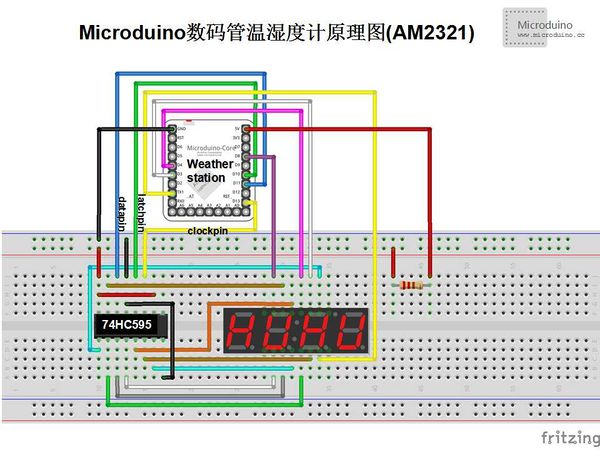
Application field Air conditioner, dehumidifier, test and inspection equipment, consumer goods, automotive, automatic control, data recorder, weather stations, household appliances, humidity control, medical, and other relative humidity control. Product advantages Completely interchangeable, the cost is low, long-term stability, relative humidity and temperature measurement, signal transmission distance long, digital signal output, accurate calibration, extremely low power consumption, standard single bus digital interface, standard I2C bus digital interface, communication can be free to choose. SchematicPin Tables:
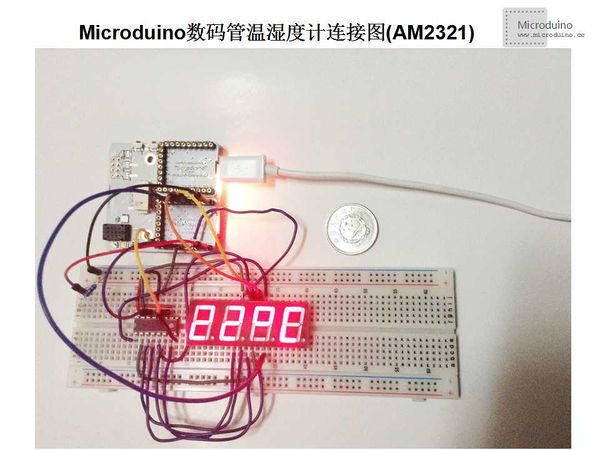
ProgramRefer to AM2321Segments.ino DebugStep 1: Download AM2312 library, uncompress it to libraries folder of Arduino IDE, and then restart IDE. https://github.com/wangdong/AM2321 Step 2:Copy the code to IDE and compile it. Step 3:Set up the circuit, as follows: Plug in the Microduino-Core and Microduino-FT232R to Microduino-Weatherstation module. Step 4:Download the program and run it. Step 5:Observe the digital tube. Find a hot object to close the temperature sensor or blowing on the sensor, the digital tube will display the result.
ResultAfter AM2321 sensor near the heat source, the digital tube displayed value will rise, leave the heat source temperature will gradually reduce. Blowing on the sensor, the number will rise too.
Video |
