Open Source LED Dot Matrix Screen
| Language: | English • 中文 |
|---|
Contents[hide]Outline
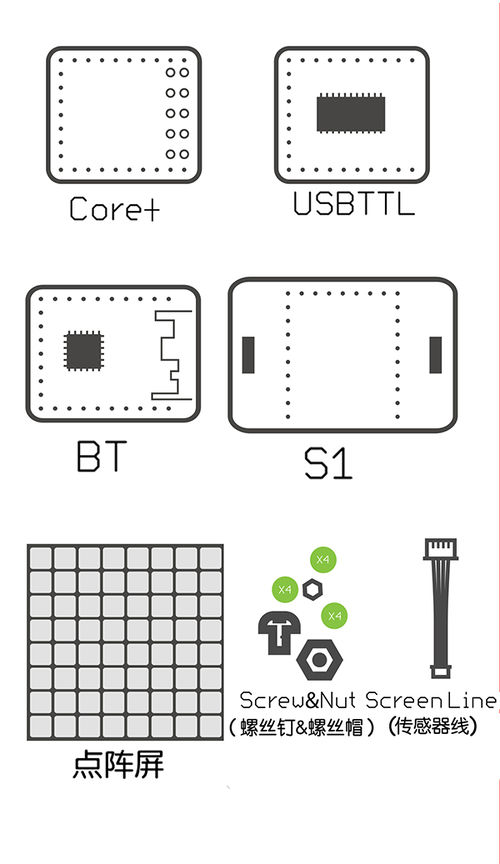
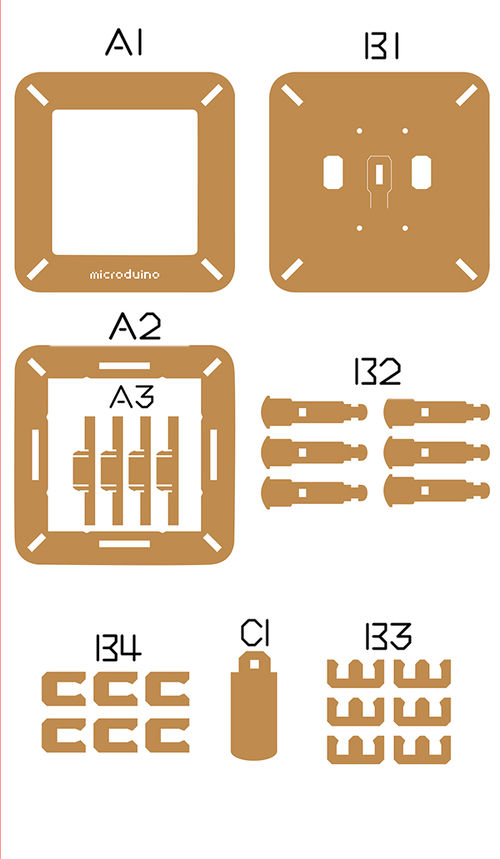
Bill of Material
Principle of the Experiment
Program Download
Programming
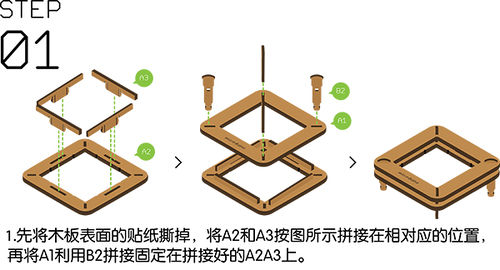
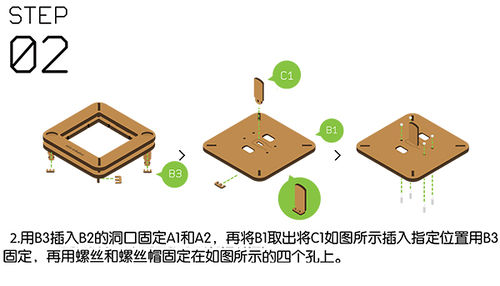
Installation
Operating Instruction
|
Code Instruction
uint8_t Addr[MatrixPix_X][MatrixPix_Y] = { 64 }
Define the IIC address that is set for Dot Matrix module is 64 and cascade type.
display.getDeviceAddr(a)
Get the IIC address of the device.
display.getWidth(),display.getHeight()
Return X,Y coordinates.
display.setLedColor(x, y, random(0, 255), random(0, 255), random(0, 255))
Set the color of each LED randomly.
display.clearDisplay()
Clean up the screen.
display.setColor(X,Y,Z)
Set the color of full screen. X: Red Y: Green Z: Blue
display.writeString("string", MODE, time ,z)
string:An arbitrary string. MODE: MODE_H display characters horizontally. /MODE_V display characters vertically. time: Show time.(flow velocity). z: X/Y coordinate.
display.drawBMP(X,Y,W,H,logoA)
X:Horizontal coordinates Y: Longitudinal coordinate W:The width of the image H:The height of the image logoA: Image array.
display.drawBMP(X,Y,logoB)
X:Horizontal coordinates Y: Longitudinal coordinate logoB:Image array(Because logoB is the array of BMP file, you don’t need to obtain the image size again. To get in-depth knowledge about BMP, you can refer to the dot matrix module display the BMP color graph).
display.drawBox(X,Y,I,W)
This function is used to drawing a solid rectangle. X: Horizontal coordinate. Y: Longitudinal coordinate. I: Length. W: Width.
display.drawRBox(X, Y, I,W)
This function is used to drawing a solid apex angle bending rectangular. X: Horizontal coordinate. Y: Longitudinal coordinate. I: Length. W: Width.
display.drawFrame(X,Y,I,W)
This function is used to draw a hollow rectangle. X: Horizontal coordinate. Y: Longitudinal coordinate. I: Length. W: Width.
display.drawRFrame(X,Y,I,W,)
This function is used to draw a hollow apex angle bending rectangular. X: Horizontal coordinate. Y: Longitudinal coordinate. I: Length. W: Width.
display.drawCircle(X,Y,D)
This function is used to draw a hollow circle. X: Horizontal coordinate. Y: Longitudinal coordinate. D: Diameter.
display.drawDisc(X,Y,D)
This function is to draw a solid circle. X: Horizontal coordinate. Y: Longitudinal coordinate. D: Diameter.
display.drawLine(X,Y,M,N)
This function is to draw a straight line. X: Starting point horizontal coordinate. Y: Starting point longitudinal coordinate. M: Finishing point horizontal coordinate. N: Ending point longitudinal coordinate.
FAQ
- Q:How to know the IIC address?
- A:Refer to[method to set the IIC address of the dot matrix module] tutorial.
- Q:How to use multiple screens at the same time?
- A: In the next page Open Source LED Dot Matrix Clock, there will be specific introduction of the cascade of multiple Microduino-Module Dot Matrix.
- Q:Why does it display incompletely after counting to 20?
- A: Because the dot matrix resolution is only 8*8, there are not enough pixels, and the screen can't display the numbers after 20 completely.
|}
