Open Source Swiping-card Music Player
Contents[hide]Outline
PORTABLE SPEAKER is always about speaker that is based on speaker which can support or read memory processors such as SD and TF in the market, and add the function that change song by swiping card. Compared with traditional computer speaker, the unique decoding function of the swiping-card speaker makes it more favored by consumers, and just because of this, it is named as the king decoding audio empire. Bill of Material
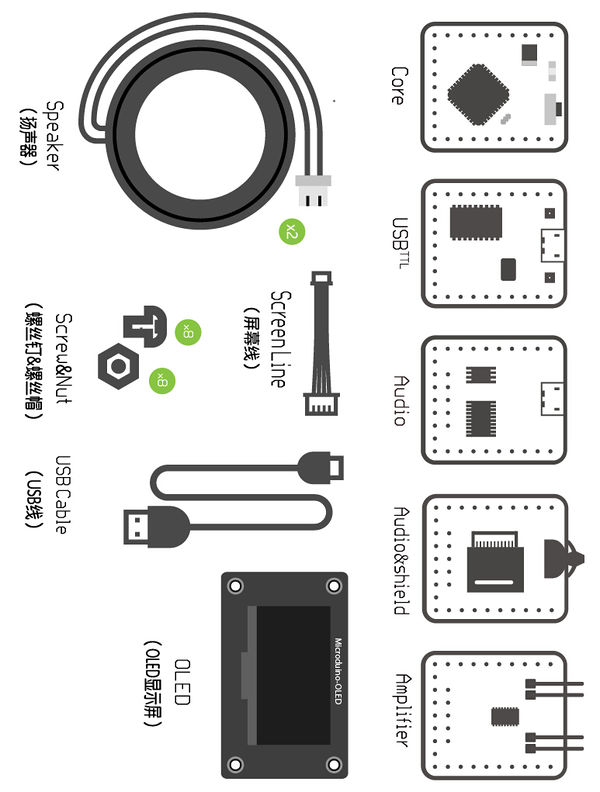
Principle of the ExperimentMicroduino-Audio board can decode and store music files. Connect Microduino-Audio&shield and the horn to realize music thumbwheel and mass storage. Connecting Microduino-Cube-S1 and Microduino-OLED can visually see volume and tracks on the OLED in tooltip way. Then jointing Microduino-USBTTL, Microduino-Core+ and other modules disorderly can realize the card speaker function. The shell of the speaker adopts wooden case, or you can also DIY your own exclusive shell.
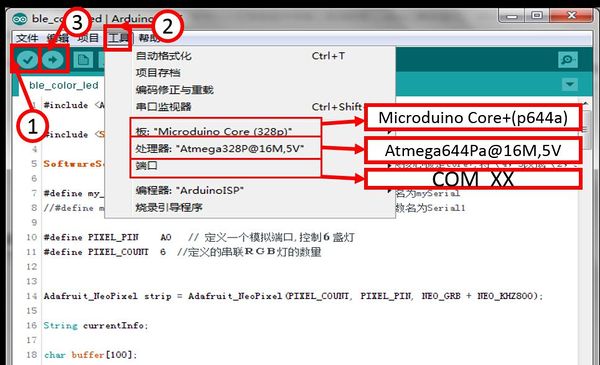
DocumentThe code of the swiping-card music player:[The code of the PORTABLE SPEAKER] Github:[Github地址] Commissioning ProcessStack Microduino-Core+ and Microduino-USBTTL together. Upload completed programs to Microduino-Core+ through Microduino-USBTTL with USB cable. Note: Please upload programs before stacking all modules together. Open the Arduino IDEprogramming software, click [FILE]->[Open], and choose Microduino_Audio_ble\ Microduino_Audio_ble.ino after opening PORTABLE SPEARKER document. Click"√", and program. Click [tool], and choose the right board + processor + port. Click"→", and upload.
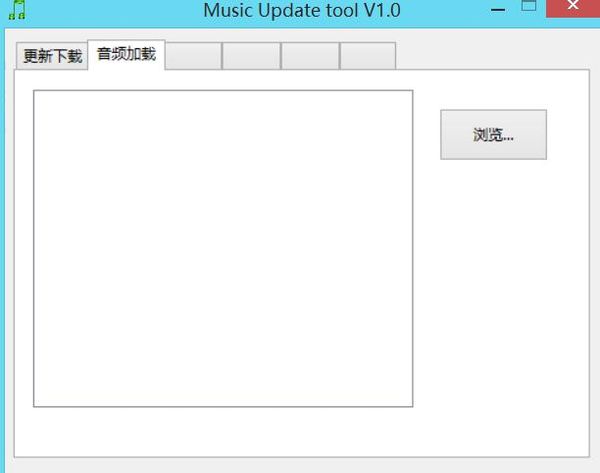
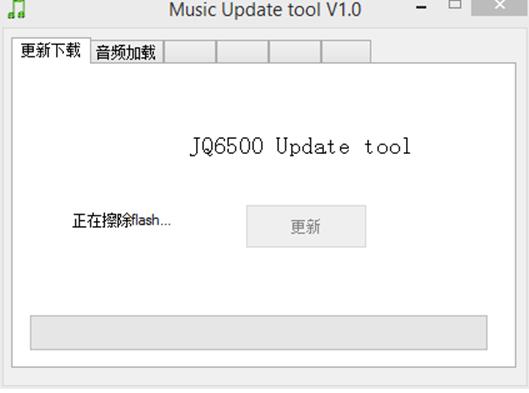
Connect the Audio module to the computer. If successfully identified, CD driver will appear in “MY COMPUTER”, and open the CD driver. Note:If not identified successfully, please check whether the cable and the module are stuck tightly. If it can’t be identified after you have checked them stuck tightly, you shoule try another USB interface. When they are connected successfully, there will show a CD driver named as Microduino-Audio, then you should do as the following steps: After opening the driver, you should choose to open MusicDownload.exe as the administrator.(Note:win10system user need to right-click to open MusicDownload.exe and select properties, and set up to run Windows 7 compatibility.) After opening, choose“Audio load” Click “Browse” and select all the songs, then click “Open”(Songs are in Case1-4.mp3). Note:Music files in Flash cannot surpass 4M, so there is only Music Num on the screen:Num1-4 have songs, but Num5-9 are the last songs. If you want to increase the songs, you can use the first method to store music into the MicroSD card. After open, click on the return to “Download updates”, and click “Update”. It will update for a long time, please be patient. When the “Check successfully” appear, you have copy music successfully. Note:Close the window after checked successfully. Don’t click update, or you’ll need to update again.
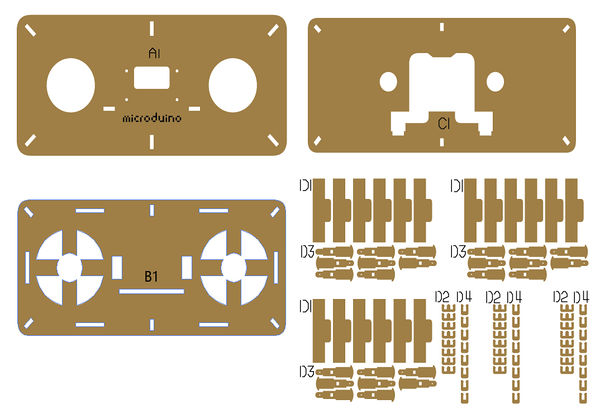
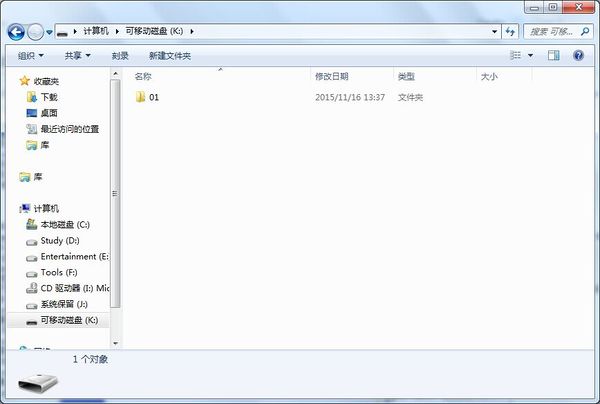
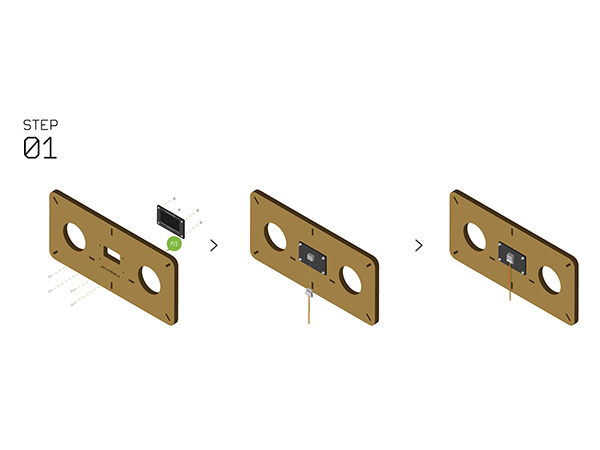
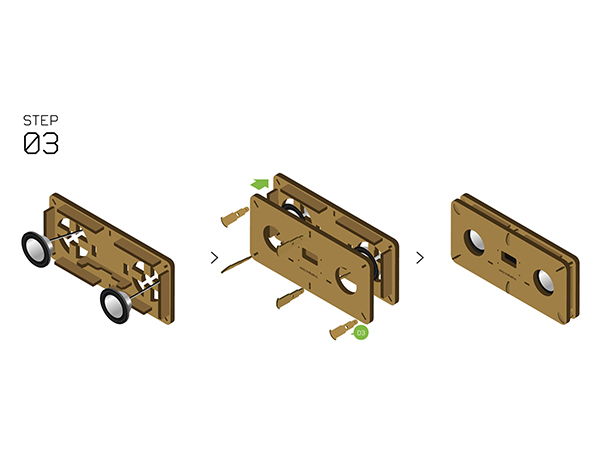
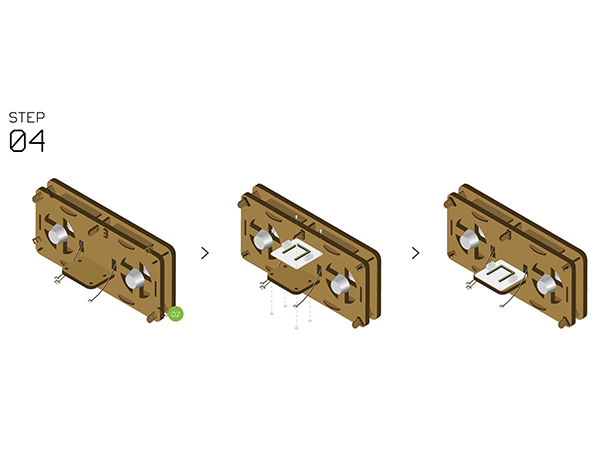
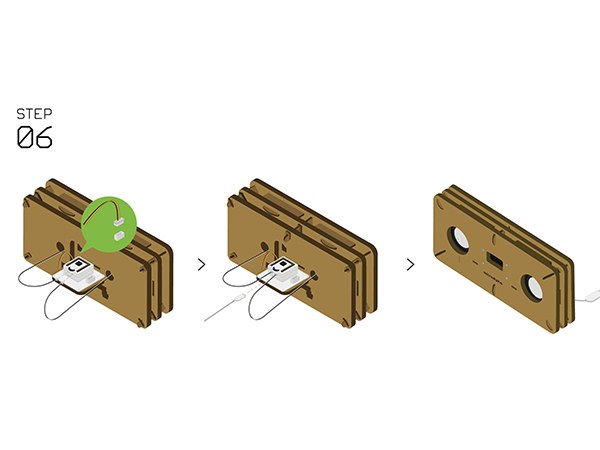
Connect Audio&Shield module to the compute trough USB cable, and at this point it will identify CD drive and a removable disk. You should double-click on the removable disk. Click the right mouse button to create a new folder, and name it as 01 (If more are needed, you can continue to name 02, 03. The rest can be done in the same manner.) Then store the music in the folder 01. InstallationAs shown in the picture, please click to view a larger image and do as the corresponding steps to assemble.
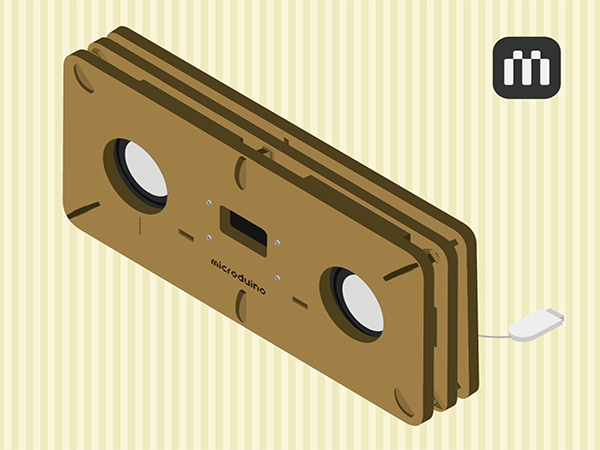
Now this music box has been completed. Swiping Card to UseUse a black Mark's pen to draw black and white stripes on different edges on a blank sheet of paper. Then swipe the stripes from the swipe card position to play music. Different stripe number plays different music. Matters Needing Attention1. In the event of:The volume can only be increased and can’t be reduced, the number of the song can only be increased and can’t be reduced, or on the contrary. Cause:The threshold setting is not reasonable in uiStep().
Change the threshold setting in uiSetup Program DescriptionPart of the main program boolean vokey(boolean _vokey)
{
key=analogRead(PIN_key)<paper_val_MIN; //When the trigger
switch(_vokey)
{
case 0:
if(!key && key_cache) //After the press release
{
key_cache=key; //The cache for judgment
return true;
}
else
{
key_cache=key; //The cache for judgment
return false;
}
break;
case 1:
if(key && !key_cache) //After the press release
{
key_cache=key; //The cache for judgement
return true;
}
else
{
key_cache=key; //The cache for judgment
return false;
}
break;
}
}
void loop()
{
if(vokey(0)) //When the trigger
{
colorWipe(strip.Color(255, 255, 0), 10);
paper_num++; //Count
// Serial.print("+");
paper_sta=true; //Read mode
time1=millis();
}
if(millis()-time1>1000 && paper_num!=0) //Trigger, and idle for more than one second it will end.
{
AUDIO.choose(paper_num); //Play songs scanned.
Serial.println(paper_num);
AUDIO.play();
//Serial.println("");
//Serial.print("num:");
//Serial.print(paper_num);
paper_num=0; //Return to zero, and wait for next scan.
paper_sta=false; //End of the read mode
}
if(!paper_sta) //Not the read mode, LED to breathe.
{
if(LED_vol>=255)
{
LED_vol_sta=1;
}
if(LED_vol<=0)
{
LED_vol_sta=0;
}
if(!LED_vol_sta)
{
LED_vol+=4;
}
else
{
LED_vol-=4;
}
colorWipe(strip.Color(LED_vol, 0, 0), 10); //Breathing lamp displays brightness.
}
delay(10);
}
// Fill the dots one after the other with a color
void colorWipe(uint32_t c, uint8_t wait) {
for(uint16_t i=0; i<strip.numPixels(); i++) {
strip.setPixelColor(i, c);
strip.show();
delay(wait);
}
}video |
