|
Overview
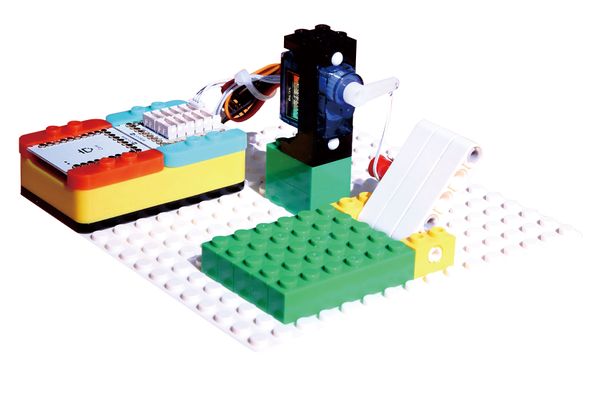
Design a reclining chair of which the angle is adjustable.
Suitable kits: mCookie102, mCookie202, mCookie302, IBC
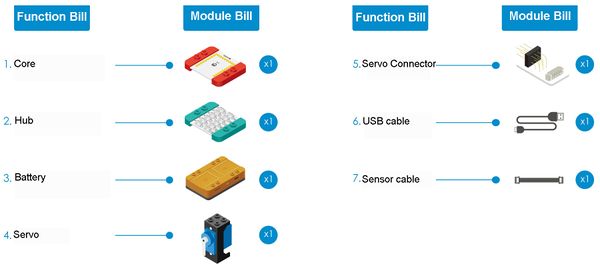
Module Bill
Module
Other Equipment
- USB cable*1
- Sensor cable*1
- Sensor shell*1
- Lego or other fixation structures
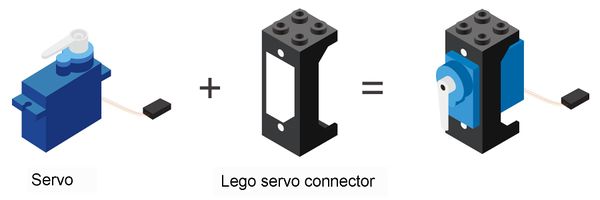
Servo
Servo is a complicated electric mechanical structure and its main axis can rotate to any specified angle between 0-180 degrees according to electricity signal. It is usually used as a rudder to control the direction for airplane, vehicle and ship models, that is why it is called servo.
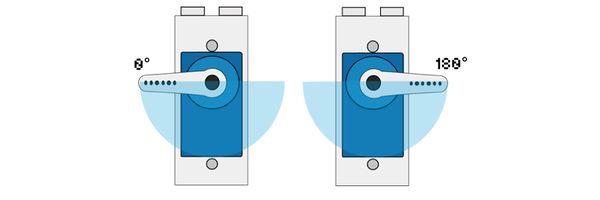
Install the rocker
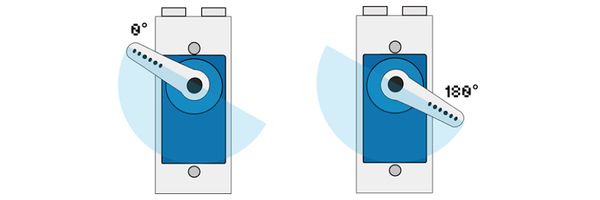
No matter what the installation angle of the rocker us, the angle which the rocker can rotate to clockwise is 0°controlled by the program, and similarly, the anticlockwise angle is 180°. In this course, we need to make the rocker rotate between the angles on the above diagram, turn the rocker slowly and observe the rotation range, no brute force please.
If you find that the rotation range of the rocker doesn’t meet the requirement, as shown on the left diagram, you need to dismount the fixation screws of the rocker with a screwdriver, unplug the rocker, turn it to a certain angle and then install it back to the main axis and rotate it again and observe the rotation range.
Servo Connector
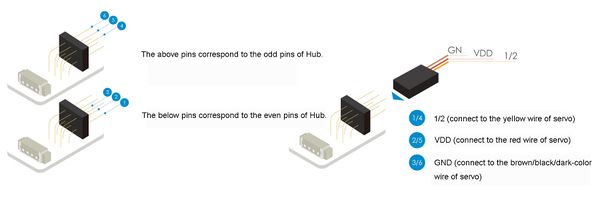
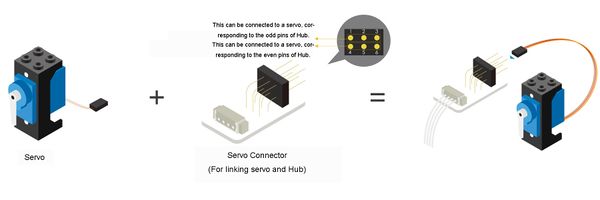
Servo can't be connected to extension module (Hub) directly, it needs the help of servo connector. There are six pins, 3 up, 3 down, of the servo connector, which can be connected to two servos at the same time.
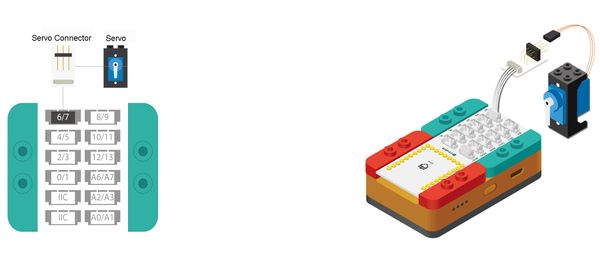
Pay attention to the positive and negative when connecting the servo to the servo connector, and make sure that the GND, VCC, and 1/2 three wires are in right position. The above pins correspond to the odd pins of Hub, and the below correspond to the even pins of Hub. For example, if you want to connect the connector to pin 6/7 of Hub, if you connect the servo to the below pins, the control pin is 6, if connect to the up pins, the control pin is 7.
Module Setup
- Assemble all modules and sensors together:
- Stick the red core module, USB upload module and green extension module together;
- Connect the servo connector pin pin 6/7 of Hub;
- Connect the servo to pin 1 (the below three pins) of servo connector;
- Plug one end of USB cable into USB upload module, and connect the other end to the computer.
Programming
Required Program Block
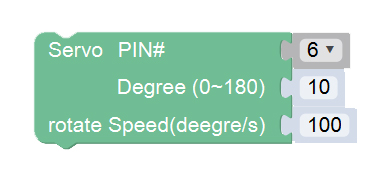
"Servo" program block
Programming Thought
We can control the servo rocker to rotate to any single between 0~180°, just need to make the rocker rotate to an specified angle, and fix the back of the chair on the rocker.
Start to Program
Connect the servo to pin 6 of Hub with the connector, and then make it rotate to 10°with the speed of 100 degrees/s.
- Test the result
- After uploading the program, make the servo rotate to the position of 10 degrees. Fix the back of the chair on the servo rocker with a wire or other things.
Technical Specification
- For details about servo, please refer to Servo.
Related Cases
Q&A
|
