Difference between revisions of "Lesson 2--Microduino OLED Usage"
(Created page with "{| style="width: 800px;" |- | ==Objective== Learn the Microduino OLED and master how to use the library to derive the OLED. ==Equipment== *'''Microduino-OLED''' Microduino...") |
|||
| (3 intermediate revisions by 2 users not shown) | |||
| Line 1: | Line 1: | ||
| + | {{Language|第二课--Microduino OLED使用}} | ||
| + | |||
{| style="width: 800px;" | {| style="width: 800px;" | ||
|- | |- | ||
| Line 39: | Line 41: | ||
==Program== | ==Program== | ||
| − | Download | + | Download program: |
| + | https://github.com/Microduino/Microduino_Tutorials/tree/master/Microduino_Advanced/Microduino_OLED | ||
==Experiment 1== | ==Experiment 1== | ||
*Display character, including the specific character and the character changed according to data. | *Display character, including the specific character and the character changed according to data. | ||
| − | + | Grammar: | |
| − | *The first line display "*_*Microduino*_*" | + | *The first line display "*_*Microduino*_*"; |
| − | *The second line display " | + | *The second line display "Time:"; |
| − | *The third line display time calculated by | + | *The third line display time calculated by function mills(), use the ms as unit, and map into the second unit, only keep two decimal. |
| − | * | + | *Grammar: |
**u8g.setFont(XXX)uses to set font, no default font, must be defined. | **u8g.setFont(XXX)uses to set font, no default font, must be defined. | ||
| − | **u8g.setPrintPos(X,Y) uses to set he | + | **u8g.setPrintPos(X,Y) uses to set he position of the specified character,X represents the horizontal position coordinate, Y represents longitudinal coordinates. The Y value can't be 0 in top line, and the value should be greater than the height of the font. |
**u8g.print(XXX)uses to display character, static characters need to add " ", no need for change data; | **u8g.print(XXX)uses to display character, static characters need to add " ", no need for change data; | ||
| − | **u8g.drawStr(X, Y,XXX) uses to display specified character, can't display changing | + | **u8g.drawStr(X, Y,XXX) uses to display specified character, can't display changing data; |
**u8g.setRot180()uses to font rotation, rotate character from 180 to 90, 270. The default value is 0; | **u8g.setRot180()uses to font rotation, rotate character from 180 to 90, 270. The default value is 0; | ||
**Change font and coordinates need to add fonts and coordinate function in front of the display function; | **Change font and coordinates need to add fonts and coordinate function in front of the display function; | ||
| Line 58: | Line 61: | ||
==Experiment 2== | ==Experiment 2== | ||
*Draw picture | *Draw picture | ||
| − | Open "OLED_Paint" example program, select board type and use the serial to | + | Open "OLED_Paint" example program, select board type and use the serial to download. |
The experiment to realize how to draw a straight line, a solid, hollow, solid rectangular, hollow rectangular, apex angle bending rectangular, the system timing simulate the pointer of second hand. | The experiment to realize how to draw a straight line, a solid, hollow, solid rectangular, hollow rectangular, apex angle bending rectangular, the system timing simulate the pointer of second hand. | ||
| − | * | + | *Grammar: |
**u8g.drawLine(X,Y,M,N) uses to draw a straight line; | **u8g.drawLine(X,Y,M,N) uses to draw a straight line; | ||
***X: starting horizontal position coordinates, Y: the starting point of the longitudinal coordinates, M: end horizontal position coordinates, N: the end of the longitudinal coordinate. | ***X: starting horizontal position coordinates, Y: the starting point of the longitudinal coordinates, M: end horizontal position coordinates, N: the end of the longitudinal coordinate. | ||
| Line 69: | Line 72: | ||
**u8g.drawFrame(X,Y,I,W) uses to draw a hollow rectangular: | **u8g.drawFrame(X,Y,I,W) uses to draw a hollow rectangular: | ||
***X: horizontal coordinates, Y: longitudinal coordinate, I: length, W: wide; | ***X: horizontal coordinates, Y: longitudinal coordinate, I: length, W: wide; | ||
| − | **u8g.drawBox(X,Y,I,W) uses to draw a solid | + | **u8g.drawBox(X,Y,I,W) uses to draw a solid rectangular; |
***X: horizontal coordinates, Y: longitudinal coordinate, I: long, W: wide | ***X: horizontal coordinates, Y: longitudinal coordinate, I: long, W: wide | ||
| − | **u8g.drawRFrame(X,Y,I,W,B) uses to draw a apex angle bending | + | **u8g.drawRFrame(X,Y,I,W,B) uses to draw a apex angle bending rectangular; |
***X: horizontal coordinates, Y: longitudinal coordinate, I: long, W: wide | ***X: horizontal coordinates, Y: longitudinal coordinate, I: long, W: wide | ||
==Experiment 3== | ==Experiment 3== | ||
| − | *Display | + | *Display Chinese characters, images and dynamic text: |
| − | **Display character using library. The images and | + | **Display character using library. The images and Chinese characters need to modulo then to print. |
| − | Modulo | + | Modulo software:'''[[File:PCtolCD.zip]]''' |
| − | *Take the | + | *Take the Chinese character as example: |
| − | **Make | + | **Make Chinese character modulo code: |
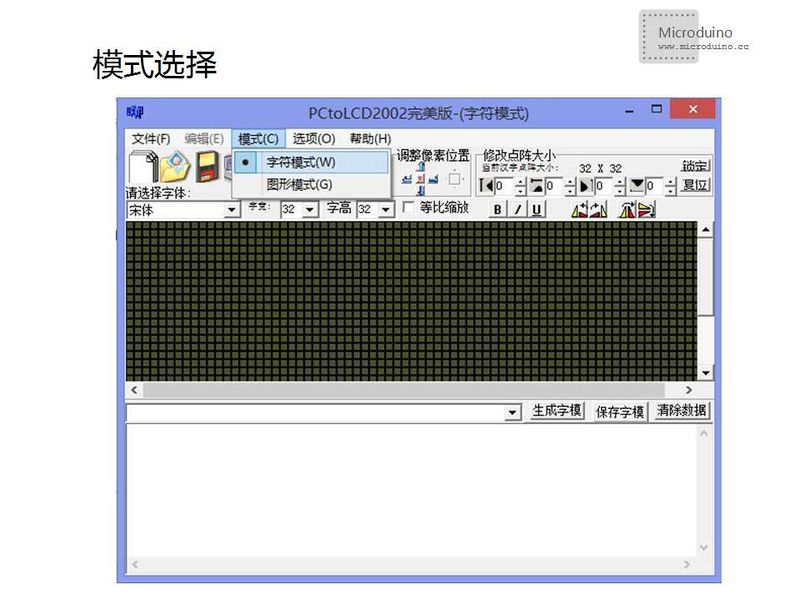
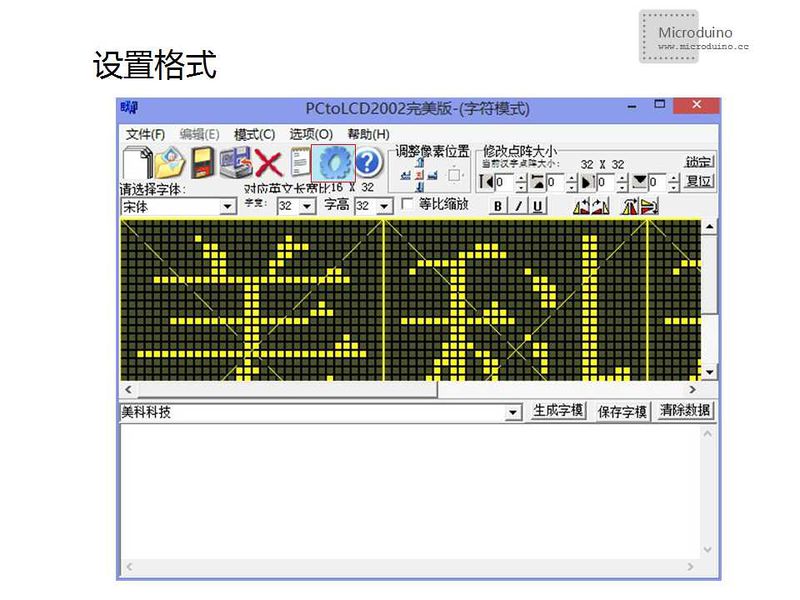
| − | Step | + | Step 1: Open the modulo software, select the mode "Character mode"; |
[[File:set_1.jpg|800px|thumb|center|Microduino-OLED]] | [[File:set_1.jpg|800px|thumb|center|Microduino-OLED]] | ||
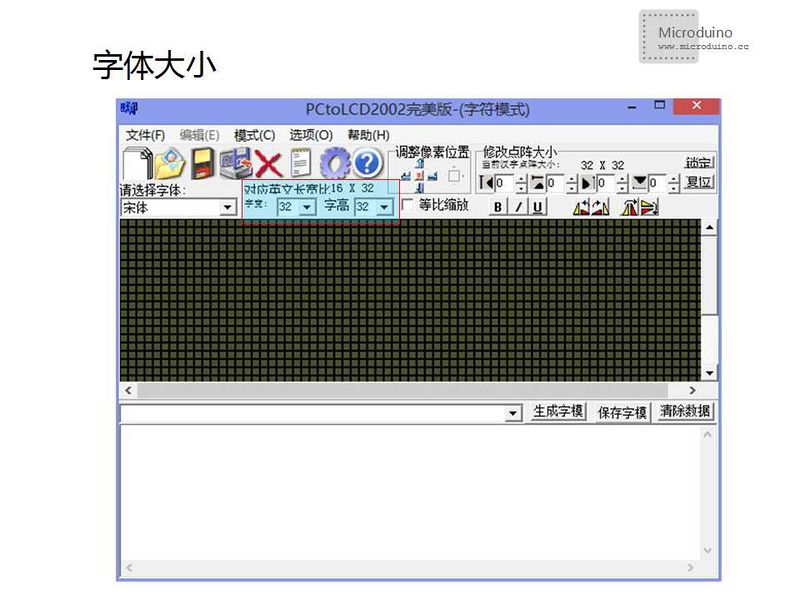
| − | Step | + | Step 2: Set font size as 32*32; |
[[File:set_2.jpg|800px|thumb|center|Microduino-OLED]] | [[File:set_2.jpg|800px|thumb|center|Microduino-OLED]] | ||
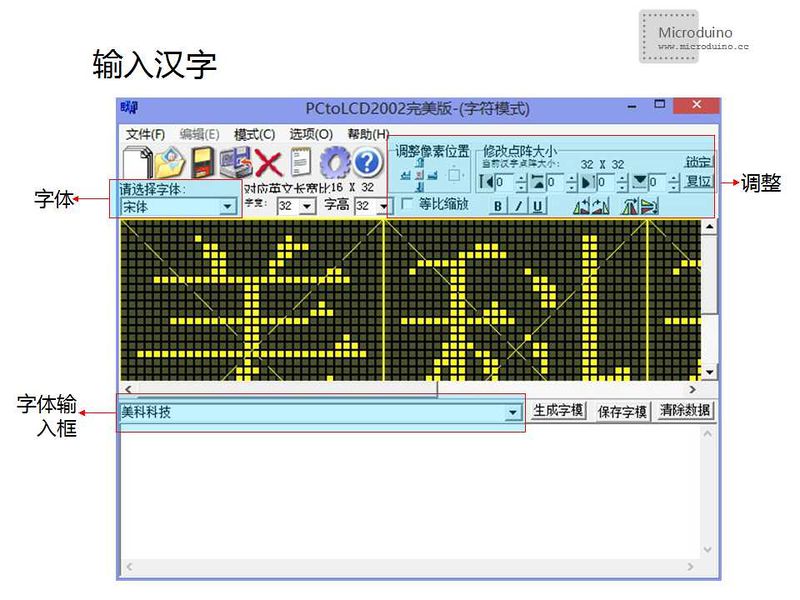
| − | Step | + | Step 3: Input chinese character, you can choose font; |
[[File:set_3.jpg|800px|thumb|center|Microduino-OLED]] | [[File:set_3.jpg|800px|thumb|center|Microduino-OLED]] | ||
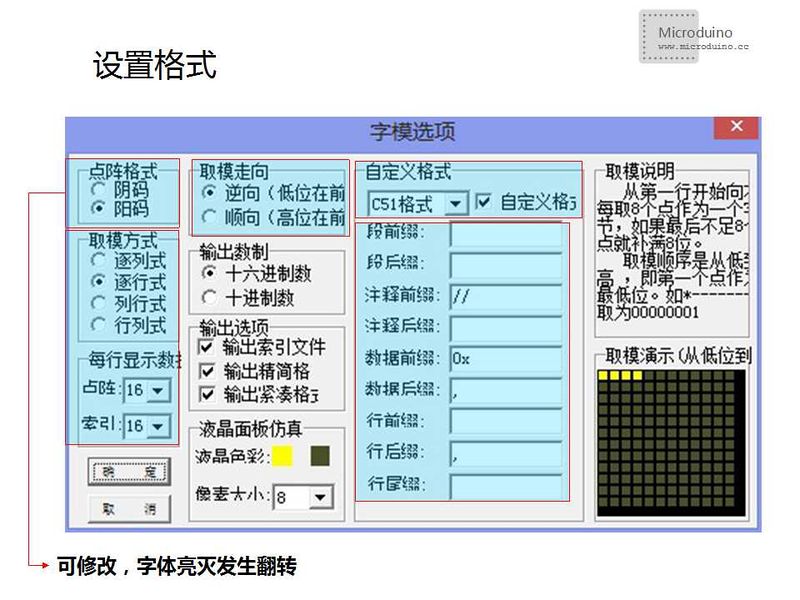
| − | Step | + | Step 4: Set modulo format; |
[[File:set_4.jpg|800px|thumb|center|Microduino-OLED]] | [[File:set_4.jpg|800px|thumb|center|Microduino-OLED]] | ||
[[File:set_5.jpg|800px|thumb|center|Microduino-OLED]] | [[File:set_5.jpg|800px|thumb|center|Microduino-OLED]] | ||
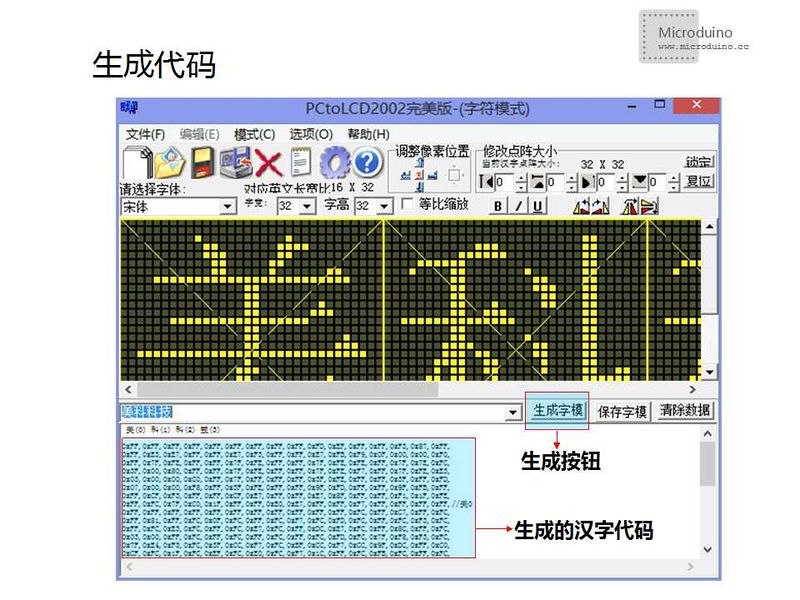
| − | Step | + | Step 5: Set the code; |
[[File:set_6.jpg|800px|thumb|center|Microduino-OLED]] | [[File:set_6.jpg|800px|thumb|center|Microduino-OLED]] | ||
| − | Step | + | Step 6: Use the code to replace the character. |
| − | + | Grammar: | |
*u8g.drawXBMP( X, Y, I, W, XXXX); | *u8g.drawXBMP( X, Y, I, W, XXXX); | ||
**X: horizontal coordinates, Y: longitudinal coordinate, I: long, W: wide, XXXX: Chinese character code name of the array. | **X: horizontal coordinates, Y: longitudinal coordinate, I: long, W: wide, XXXX: Chinese character code name of the array. | ||
==Video== | ==Video== | ||
| − | + | ||
|} | |} | ||
Latest revision as of 07:48, 12 September 2016
| Language: | English • 中文 |
|---|
ContentsObjectiveLearn the Microduino OLED and master how to use the library to derive the OLED. EquipmentMicroduino-Oled is a 0.96 inch 12864 OLED display module based on SSD1306. It uses I2C interface, and 3.3V power. The pixel is 128 * 64 (128 columns * 64 rows).
IIC communication
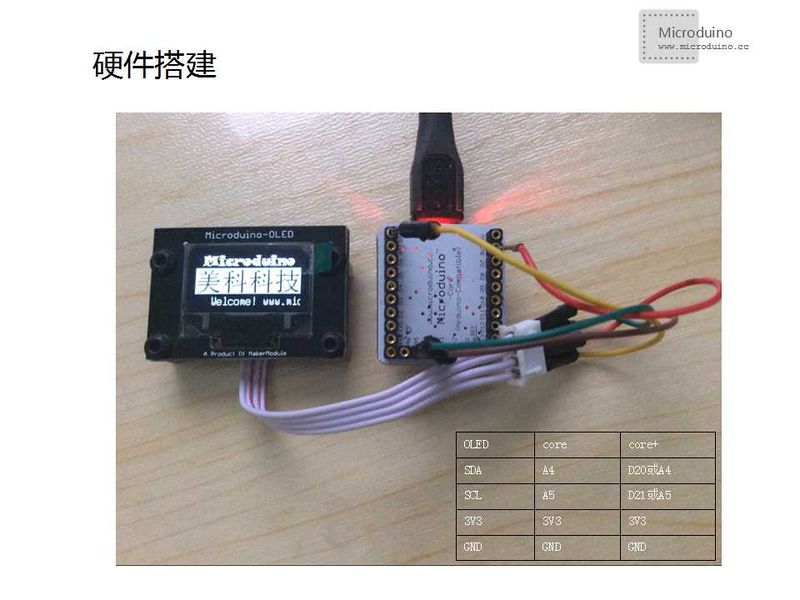
Prepare work
ProgramDownload program: https://github.com/Microduino/Microduino_Tutorials/tree/master/Microduino_Advanced/Microduino_OLED Experiment 1
Grammar:
Experiment 2
Open "OLED_Paint" example program, select board type and use the serial to download. The experiment to realize how to draw a straight line, a solid, hollow, solid rectangular, hollow rectangular, apex angle bending rectangular, the system timing simulate the pointer of second hand.
Experiment 3
Modulo software:File:PCtolCD.zip
Step 1: Open the modulo software, select the mode "Character mode"; Step 2: Set font size as 32*32; Step 3: Input chinese character, you can choose font; Step 4: Set modulo format; Step 5: Set the code; Step 6: Use the code to replace the character. Grammar:
Video |
