Difference between revisions of "Microduino Hall sensor usage"
From Microduino Wiki
(Created page with "{{Language | Microduino 霍尔传感器使用}} {| style="width: 800px;" |- | ==Objective== This tutorial will teach you how to use the hall sensor. ==Equipment== *'''Micro...") |
|||
| Line 30: | Line 30: | ||
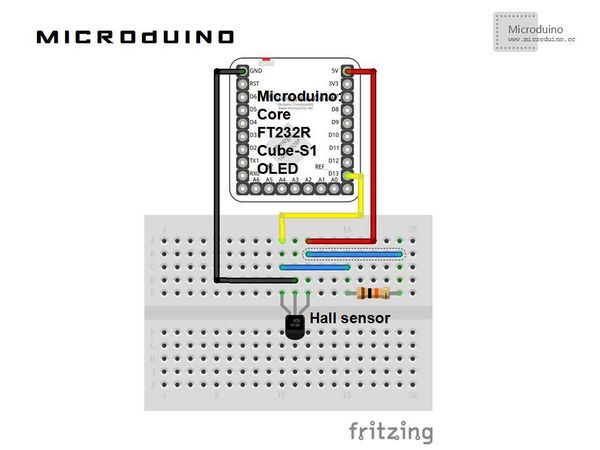
[[File:霍尔传感器使用连接图.jpg|600px|center|thumb]] | [[File:霍尔传感器使用连接图.jpg|600px|center|thumb]] | ||
| − | Step | + | Step 2: Compile the program and download. |
| − | Step | + | Step 3: Use a magnet to shake in the surrounding, observe the OLED's output. |
==Result== | ==Result== | ||
Latest revision as of 10:28, 28 September 2016
| Language: | English • 中文 |
|---|
ObjectiveThis tutorial will teach you how to use the hall sensor. Equipment
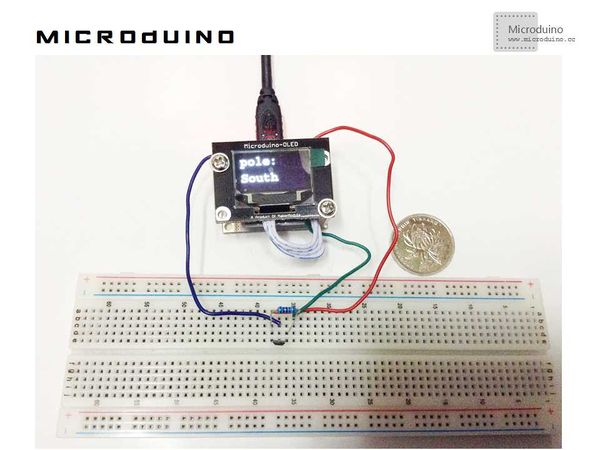
SchematicConnect the digital I/O port to pin13 ProgramRefer to hallSensorOLED DebugStep 1: Stack the Microduino module and connect the hall sensor, as follows: Step 2: Compile the program and download. Step 3: Use a magnet to shake in the surrounding, observe the OLED's output. ResultOLED will display south and north. Video |

