Difference between revisions of "Sensor-Color LED"
(→Programming) |
(→Programming) |
||
| (One intermediate revision by the same user not shown) | |||
| Line 61: | Line 61: | ||
<tab name="Arduino for Microduino" style="width:100%;"> | <tab name="Arduino for Microduino" style="width:100%;"> | ||
==Introduction== | ==Introduction== | ||
| − | The ColorLED is used as an output pin. The library is based on the Adafruit_NeoPixel library '''([https://learn.adafruit.com/adafruit-neopixel-uberguide/arduino-library Read more])''' is used to control the ColorLED. Most of the functions are | + | The ColorLED is used as an output pin. The library is based on the Adafruit_NeoPixel library '''([https://learn.adafruit.com/adafruit-neopixel-uberguide/arduino-library Read more])''' is used to control the ColorLED. Most of the functions are similar. |
==Key Functions== | ==Key Functions== | ||
*Required Libraries: '''Microduino_ColorLED.h''' | *Required Libraries: '''Microduino_ColorLED.h''' | ||
| Line 89: | Line 89: | ||
<syntaxhighlight lang="cpp" highlight="1-3,5,6,8,9,11,12,20,21,23,24,30-33,38-41,46-49"> | <syntaxhighlight lang="cpp" highlight="1-3,5,6,8,9,11,12,20,21,23,24,30-33,38-41,46-49"> | ||
//Include the required libraries to control the ColorLED | //Include the required libraries to control the ColorLED | ||
| − | // | + | //Based on: https://learn.adafruit.com/adafruit-neopixel-uberguide/arduino-library |
| − | #include < | + | #include <Microduino_ColorLED.h> |
//Define the pin the ColorLED is connected to | //Define the pin the ColorLED is connected to | ||
| Line 99: | Line 99: | ||
//Declare and initialize the ColorLED object | //Declare and initialize the ColorLED object | ||
| − | + | ColorLED strip = ColorLED(COLORLED_NUM, COLORLED_PIN); | |
void setup() { | void setup() { | ||
Latest revision as of 20:06, 1 December 2017
| Language: | English • 中文 |
|---|
|
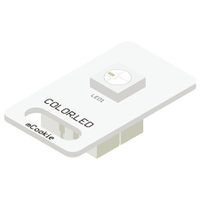
The product number of Sensor-Color LED is: MSDL11 Sensor-Color LED is full color LED, adopting single serial cascade protocol. Only one I/O port can control the RGB color of each LED on the line. If the power supply supports, it can support the cascade of as many as 1024 LEDs.
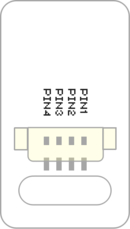
ContentsIntroduction of Sensor Pin
Features
Specification
Documents
UsageBasic FunctionalityThe ColorLED is a trinket which emits different colors based on the set red, green, and blue values. A Core module can control the ColorLED to output the desired colors. Note: ColorLEDs can be connected together in a daisy chain fashion, and each ColorLED can be addressed individually using the index number. First ColorLED being 0, second ColorLED being 1, etc. ProgrammingIntroductionThe ColorLED is used as an output pin. The library is based on the Adafruit_NeoPixel library (Read more) is used to control the ColorLED. Most of the functions are similar. Key Functions
ExampleThis is a simple example which:
Note: Important lines of code are highlighted. //Include the required libraries to control the ColorLED
//Based on: https://learn.adafruit.com/adafruit-neopixel-uberguide/arduino-library
#include <Microduino_ColorLED.h>
//Define the pin the ColorLED is connected to
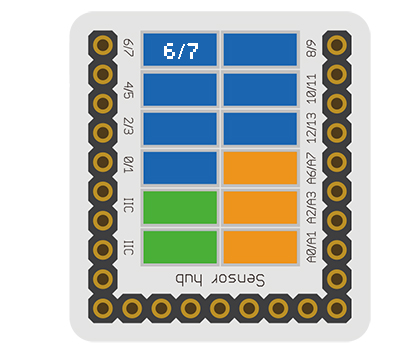
const int COLORLED_PIN = 6;
//Define the number of ColorLEDs daisy chained together
const int COLORLED_NUM = 1;
//Declare and initialize the ColorLED object
ColorLED strip = ColorLED(COLORLED_NUM, COLORLED_PIN);
void setup() {
// put your setup code here, to run once:
//Initial serial communication port at 9600 baud
Serial.begin(9600);
//Initialize the ColorLED class object
strip.begin();
//Initialize all ColorLEDs to 'off'
strip.show();
}
void loop() {
// put your main code here, to run repeatedly:
//Configure the first ColorLED to maximum red
strip.setPixelColor(0, 255, 0, 0);
//Set the ColorLED
strip.show();
//wait 1 second
delay(1000);
//Configure the first ColorLED to maximum green
strip.setPixelColor(0, 0, 255, 0);
//Set the ColorLED
strip.show();
//wait 1 second
delay(1000);
//Configure the first ColorLED to maximum blue
strip.setPixelColor(0, 0, 0, 255);
//Set the ColorLED
strip.show();
//wait 1 second
delay(1000);
}Copy and paste the code above to the Arduino IDE or Download the above example: n/a Program Download
Programming
Hardware Setup
Results
Application
ProjectHistoryGallery
|


