Difference between revisions of "Countdown Alarm Clock"
(Created page with "{| style="width: 1000px;" |- | ==Outline== 600px|center Let’s make an alarm clock of which the countdown time can be set, and it can ring at th...") |
|||
| Line 6: | Line 6: | ||
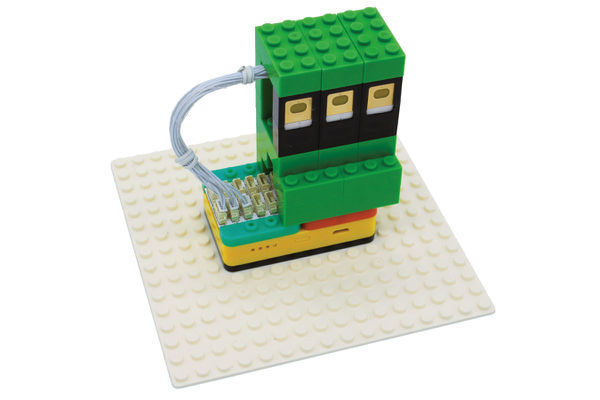
[[File:anywhere_alarm.jpg|600px|center]] | [[File:anywhere_alarm.jpg|600px|center]] | ||
| − | + | Let's make an alarm clock of which the countdown time can be set, and it can ring at the end of the countdown. | |
<br> | <br> | ||
Suitable kits: mCookie302 | Suitable kits: mCookie302 | ||
| Line 45: | Line 45: | ||
==Programming== | ==Programming== | ||
===Required Program Blocks=== | ===Required Program Blocks=== | ||
| − | *[[ | + | *[["Repeat doing" program block]] |
| − | *[[ | + | *[["Declare as", "item" program block]] |
| − | *[[ | + | *[["Touch button" program block]] |
| − | *[[ | + | *[["Waiting" program block]] |
| − | *[[ | + | *[["Delay" program block]] |
| − | *[[ | + | *[["Buzzer on-melody" program block]] |
| − | *[[ | + | *[["Println" program block]] |
| − | *[[ | + | *[["Calculate" program block]] |
| − | *[[ | + | *[["Text" program block]] |
| − | *[[ | + | *[["Join" program block]] |
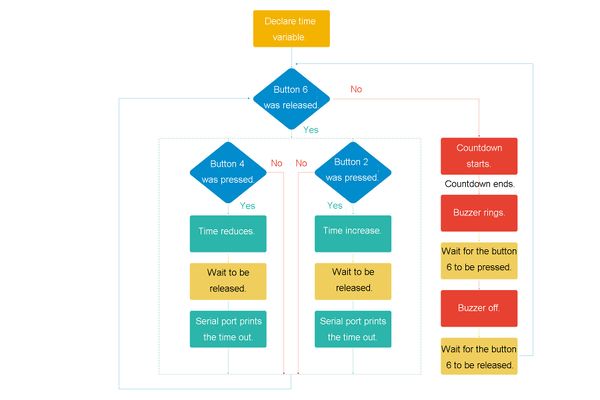
===Programming Thought=== | ===Programming Thought=== | ||
| Line 74: | Line 74: | ||
'''Start the countdown. After then end of time, the buzzer rings. ''' | '''Start the countdown. After then end of time, the buzzer rings. ''' | ||
<br> | <br> | ||
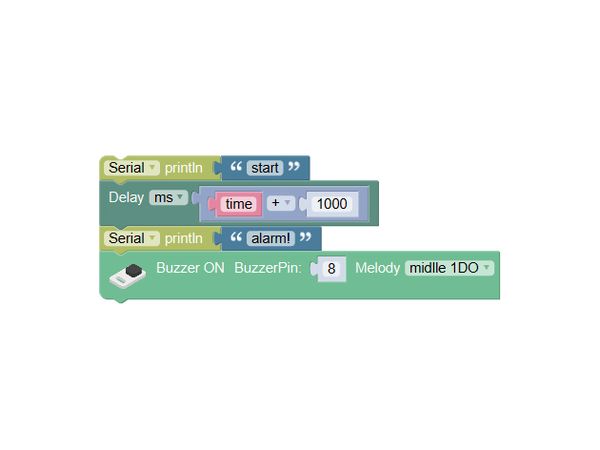
| − | Send | + | Send "start" to computer, representing the countdown starts. Make the second number saved in variable time multiply 1000(ms), and delay, then send "alarm!" to computer, representing the time is over. |
[[File:mixly-ctrl-alarm-code1.jpg|600px|center]] | [[File:mixly-ctrl-alarm-code1.jpg|600px|center]] | ||
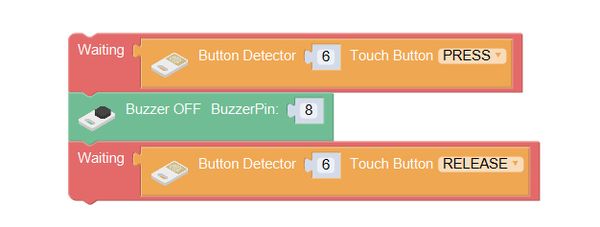
'''Wait for the touch button 6 to be pressed again, then turn the buzzer off.''' | '''Wait for the touch button 6 to be pressed again, then turn the buzzer off.''' | ||
| Line 89: | Line 89: | ||
<br> | <br> | ||
<br> | <br> | ||
| − | Q: Although we have implemented the countdown, we | + | Q: Although we have implemented the countdown, we can't see the process of it, how can we see the subtraction of time? |
<br> | <br> | ||
A: Each time of the time subtracting 1s, print it out, so that we can see the time on the serial monitor. | A: Each time of the time subtracting 1s, print it out, so that we can see the time on the serial monitor. | ||
| Line 100: | Line 100: | ||
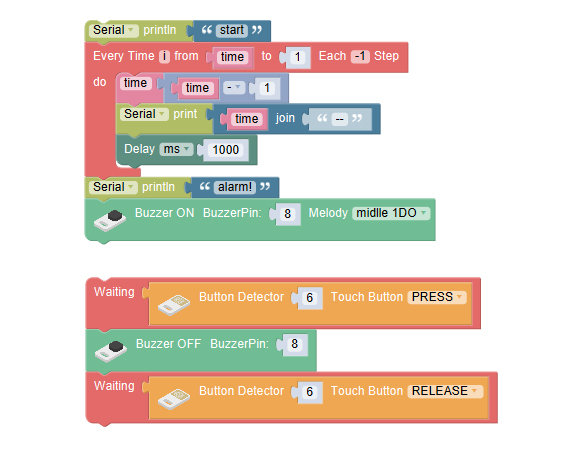
'''Display the countdown process, and the buzzer will ring at the end of that. ''' | '''Display the countdown process, and the buzzer will ring at the end of that. ''' | ||
<br> | <br> | ||
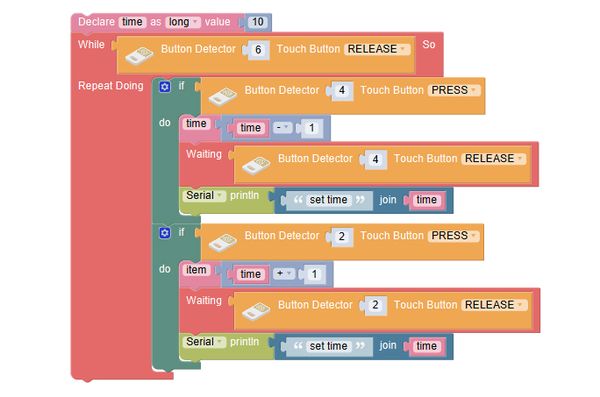
| − | Use every time program block. Because it is countdown, the execution time is from | + | Use every time program block. Because it is countdown, the execution time is from time to 1, and the step is -1. During each execution, reduce the variable time by 1, and send the second number saved in time to computer, and then delay 1s. |
[[File:mixly-ctrl-alarm-code4.jpg|600px|center]] | [[File:mixly-ctrl-alarm-code4.jpg|600px|center]] | ||
Latest revision as of 10:18, 13 October 2016
ContentsOutlineLet's make an alarm clock of which the countdown time can be set, and it can ring at the end of the countdown.
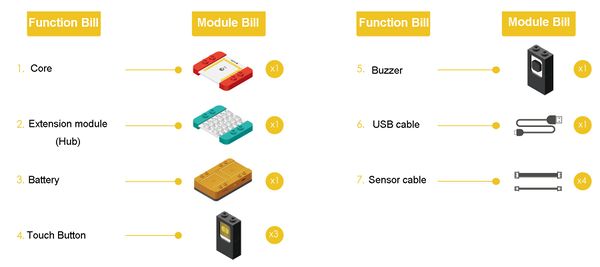
Module BillModule
Other Equipment
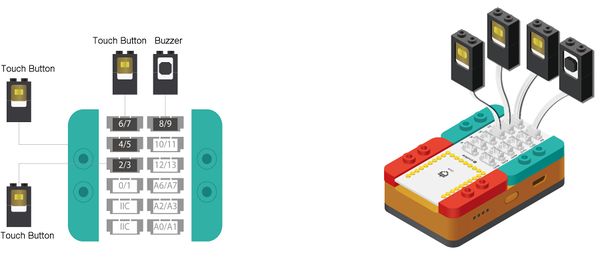
Module SetupSetup
ProgrammingRequired Program Blocks
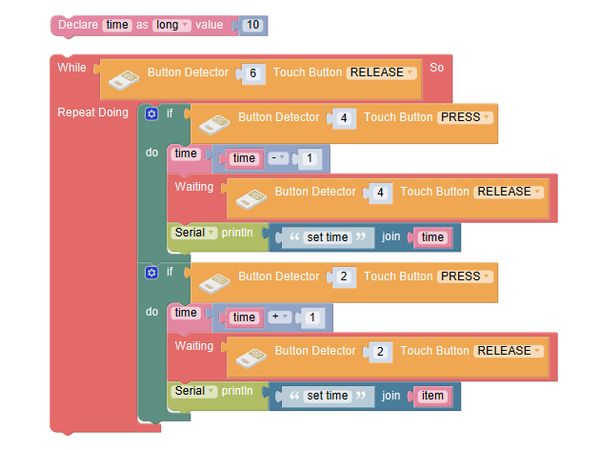
Programming ThoughtChoose 3 touch buttons, one to control the set, start and end of the countdown, another to set the time addition of the countdown, and another to set the subtraction of the countdown. Start to ProgramDeclare as. After the touch button 6 is released, repeat executing the time set program.
Start the countdown. After then end of time, the buzzer rings.
Wait for the touch button 6 to be pressed again, then turn the buzzer off.
Display the countdown process, and the buzzer will ring at the end of that.
Technical Specification
Related CasesFAQ |
