Difference between revisions of "Microduino Bank Queuing Management System"
(Created page with "{| style="width: 800px;" |- | ==Purpose== The course will show you how to use Microduino to simulate a Bank Queuing System. ==Equipment== {|class="wikitable" |- |Module||...") |
|||
| Line 90: | Line 90: | ||
[[File:bankbooker2.png|600px|center|thumb]] | [[File:bankbooker2.png|600px|center|thumb]] | ||
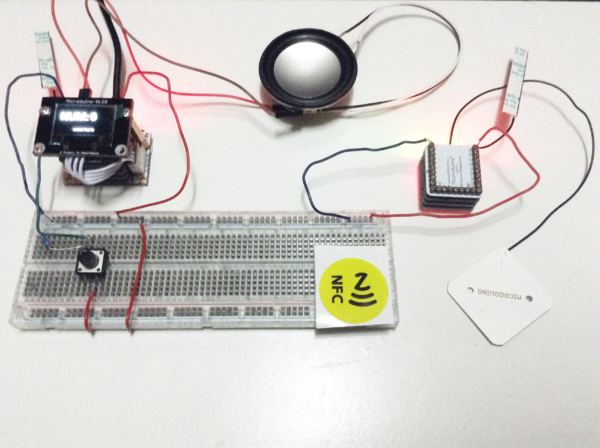
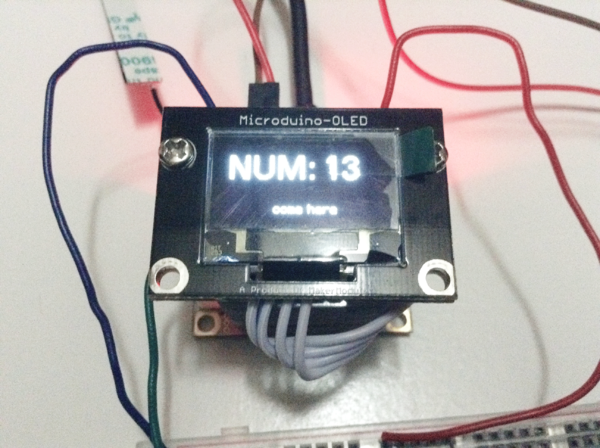
| − | Step 4: At the same time, OLED will show | + | Step 4: At the same time, OLED will show "0", meaning no one is queuing. |
[[File:bankbooker3.png|600px|center|thumb]] | [[File:bankbooker3.png|600px|center|thumb]] | ||
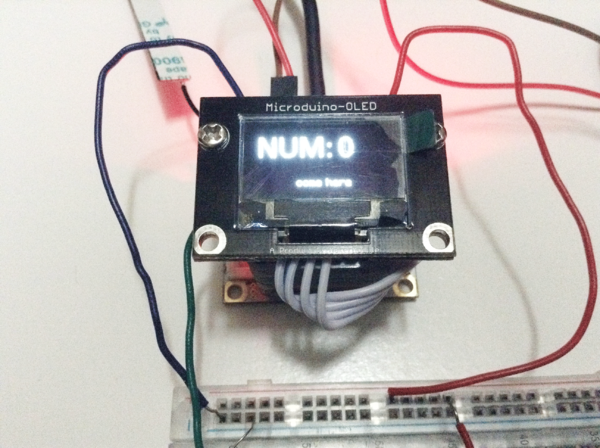
| − | Then, take NFC label to swipe through the sensor area and the receiver will show | + | Then, take NFC label to swipe through the sensor area and the receiver will show 1, meaning people start to queue up and there is a first customer to take care. At the same time, no matter how many time you swipe through, the display on OLED remains the same, meaning the queuing people are increasing. |
| − | At the receiving end, as long as you press the next button, the displayed number on OLED will add one and you will hear | + | At the receiving end, as long as you press the next button, the displayed number on OLED will add one and you will hear "Next", meaning the former customer has done with his/her business. |
[[File:bankbooker4.png|600px|center|thumb]] | [[File:bankbooker4.png|600px|center|thumb]] | ||
Latest revision as of 08:41, 13 September 2016
|
PurposeThe course will show you how to use Microduino to simulate a Bank Queuing System. Equipment
SchematicModules of the receiver:
Modules of sender:
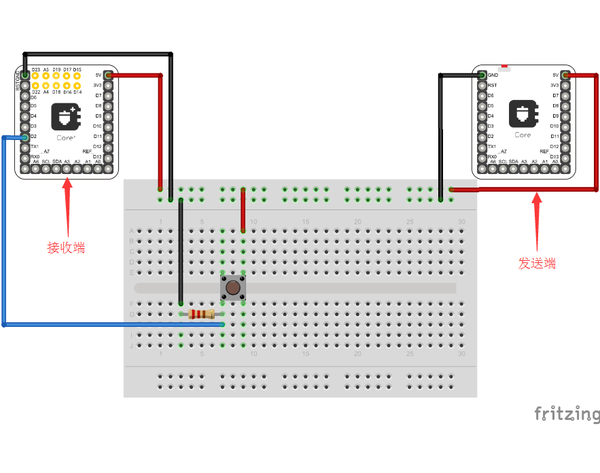
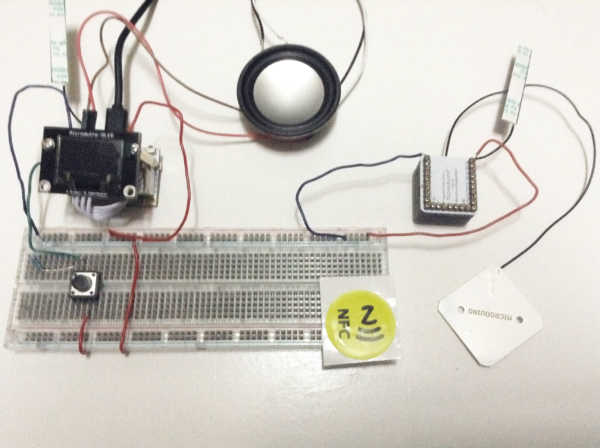
ProgramDebuggingStep 1: Build circuit according to schematic, as follows: Step 2: Make audio files and copy them into SD card, referring to: [Microduino LM4863 Music player -301KIT] Audio file conversion tool:File:Tools lm4863.zip
Step 4: At the same time, OLED will show "0", meaning no one is queuing. Then, take NFC label to swipe through the sensor area and the receiver will show 1, meaning people start to queue up and there is a first customer to take care. At the same time, no matter how many time you swipe through, the display on OLED remains the same, meaning the queuing people are increasing. At the receiving end, as long as you press the next button, the displayed number on OLED will add one and you will hear "Next", meaning the former customer has done with his/her business. ResultYou can simulate a Bank Queuing System. Video |
