Difference between revisions of "Open Source Smart Desktop Alert Base"
| Line 3: | Line 3: | ||
| | | | ||
==Outline== | ==Outline== | ||
| − | * | + | *Project: Microduino smart electric scale |
| − | * | + | *Object: Smart reminder of drinking water, and interesting desktop scale. |
| − | * | + | *Difficulty: Medium |
| − | *Time- | + | *Time-consuming: 2 hours |
| − | * | + | *Maker: |
*Introduction: | *Introduction: | ||
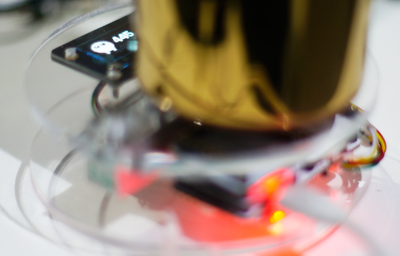
In this tutorial, we will use Microduino module product to build a smart desktop scale quickly. It can weigh out the weight of small objects whose weight are around 2kg, and display the weight on the OLED screen, and also can return the data to the phone. Using the function of water reminder, if long time without drinking water, it will make a prompt. | In this tutorial, we will use Microduino module product to build a smart desktop scale quickly. It can weigh out the weight of small objects whose weight are around 2kg, and display the weight on the OLED screen, and also can return the data to the phone. Using the function of water reminder, if long time without drinking water, it will make a prompt. | ||
| Line 46: | Line 46: | ||
Mircoduino-Weight module and the pressure sensor at the base form a wheatstone bridge, which can measure the weight on the base, then the Core collects the weight data and real-time displays on the OLED screen to make the user be able to observe the change of the data on the scale. Then after the data that the desktop scale measures being stable, the core CPU will take the data of the weight at this time as the final weight that have measured. | Mircoduino-Weight module and the pressure sensor at the base form a wheatstone bridge, which can measure the weight on the base, then the Core collects the weight data and real-time displays on the OLED screen to make the user be able to observe the change of the data on the scale. Then after the data that the desktop scale measures being stable, the core CPU will take the data of the weight at this time as the final weight that have measured. | ||
[[File:Weightyuanli.jpg||600px|center]] | [[File:Weightyuanli.jpg||600px|center]] | ||
| − | The control principle of the whole system is connecting with the above two parts. When Microduino-Core detects that someone is near to it through PIR sensor, | + | The control principle of the whole system is connecting with the above two parts. When Microduino-Core detects that someone is near to it through PIR sensor, it'll control the Lantern module to change color, and the Audio module will broadcast "Welcome to come" to achieve the effect of welcome. |
*Main Sensors | *Main Sensors | ||
[[Microduino-Weight]] | [[Microduino-Weight]] | ||
| − | Resistance strain sensors is based on this principle | + | Resistance strain sensors is based on this principle: Elastomer(elastic element, and sensitive grider)produces elastic deformation under the action of the external force, and make the resistance strain gauge(transition element)which is stick on its surface deform along with it. After the deformation of the resistance strain gauge, its resistance will change(increase or decrease). And through the corresponding measurement, the circuit converts the resistance into the electrical signal which can be identified by chip. |
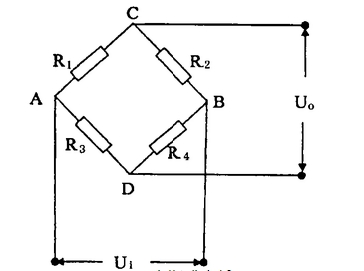
| − | In order to measure the change of the resistance of the weighing | + | In order to measure the change of the resistance of the weighing sensor's strain gage, the strain gauge is usually adopted to form abridge circuit(wheatstone bridge) to measure. When the measured gravity is on the strain gauge, the wheatstone bridge adhesive on the elastomer will produce unbalanced output, which is proportional to the gravity being measured. |
[[File:Weightcir.jpg||400px|center]] | [[File:Weightcir.jpg||400px|center]] | ||
==Document== | ==Document== | ||
| − | The code of desktop | + | The code of desktop scale: 【'''[[media:Watercontrol.zip| The code of desktop scale]]'''】 |
==Commissioning Process== | ==Commissioning Process== | ||
| Line 61: | Line 61: | ||
Open Arduino IDE programming software, and click [File]->[Open]. | Open Arduino IDE programming software, and click [File]->[Open]. | ||
[[File:Dl1.jpg||300px|center]] | [[File:Dl1.jpg||300px|center]] | ||
| − | Browse to the project program address, and click | + | Browse to the project program address, and click "watercontrol.ino" to open the program. |
[[File:Weightide1.png||400px|center]] | [[File:Weightide1.png||400px|center]] | ||
Click [Tool], choose the board card(Microduino-Core) in the board card options, choose processor(Atmega328p@16M,5V)in the processor options, choose the right port number in the port options, then program directly. | Click [Tool], choose the board card(Microduino-Core) in the board card options, choose processor(Atmega328p@16M,5V)in the processor options, choose the right port number in the port options, then program directly. | ||
| Line 68: | Line 68: | ||
*Set up | *Set up | ||
Fix the Microduino-Duo-H baseboard on the transparent acrylic board on one side, and connect Microduino-OLED to the OLED interface of Microduino-Duo-H. | Fix the Microduino-Duo-H baseboard on the transparent acrylic board on one side, and connect Microduino-OLED to the OLED interface of Microduino-Duo-H. | ||
| − | + | Note: The wire of OLED should pass through the hole in the middle of the electric bridge. | |
Fix the Duo-H baseboard. | Fix the Duo-H baseboard. | ||
[[File:Weightbuild1.png||400px|center]] | [[File:Weightbuild1.png||400px|center]] | ||
Latest revision as of 08:05, 13 September 2016
Contents[hide]Outline
In this tutorial, we will use Microduino module product to build a smart desktop scale quickly. It can weigh out the weight of small objects whose weight are around 2kg, and display the weight on the OLED screen, and also can return the data to the phone. Using the function of water reminder, if long time without drinking water, it will make a prompt. Bill of Material
Principle of the ExperimentMircoduino-Weight module and the pressure sensor at the base form a wheatstone bridge, which can measure the weight on the base, then the Core collects the weight data and real-time displays on the OLED screen to make the user be able to observe the change of the data on the scale. Then after the data that the desktop scale measures being stable, the core CPU will take the data of the weight at this time as the final weight that have measured. The control principle of the whole system is connecting with the above two parts. When Microduino-Core detects that someone is near to it through PIR sensor, it'll control the Lantern module to change color, and the Audio module will broadcast "Welcome to come" to achieve the effect of welcome.
Microduino-Weight Resistance strain sensors is based on this principle: Elastomer(elastic element, and sensitive grider)produces elastic deformation under the action of the external force, and make the resistance strain gauge(transition element)which is stick on its surface deform along with it. After the deformation of the resistance strain gauge, its resistance will change(increase or decrease). And through the corresponding measurement, the circuit converts the resistance into the electrical signal which can be identified by chip. In order to measure the change of the resistance of the weighing sensor's strain gage, the strain gauge is usually adopted to form abridge circuit(wheatstone bridge) to measure. When the measured gravity is on the strain gauge, the wheatstone bridge adhesive on the elastomer will produce unbalanced output, which is proportional to the gravity being measured. DocumentThe code of desktop scale: 【 The code of desktop scale】 Commissioning Process
Overlay Microduino-Core and Microduino-USBTTL(no order up and down), and connect to the computer with USB cable. Open Arduino IDE programming software, and click [File]->[Open]. Browse to the project program address, and click "watercontrol.ino" to open the program. Click [Tool], choose the board card(Microduino-Core) in the board card options, choose processor(Atmega328p@16M,5V)in the processor options, choose the right port number in the port options, then program directly.
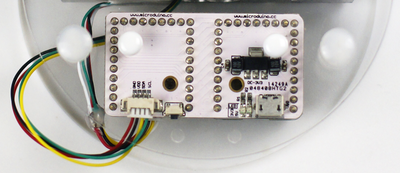
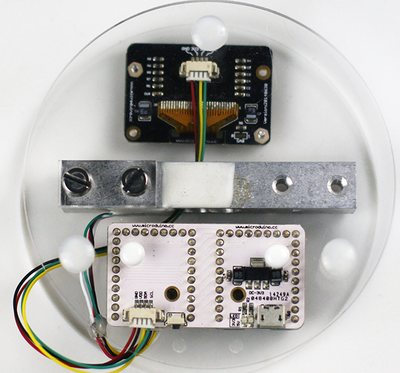
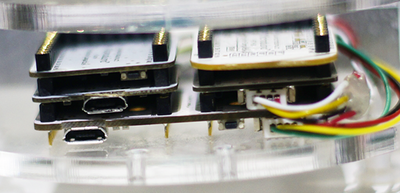
Fix the Microduino-Duo-H baseboard on the transparent acrylic board on one side, and connect Microduino-OLED to the OLED interface of Microduino-Duo-H. Note: The wire of OLED should pass through the hole in the middle of the electric bridge. Fix the Duo-H baseboard. OLED passes the hole in the middle of the electric bridge. Then connect the pressure sensor to Microduino-Weight module. Overlay the equipment that will be used on the sides of Microduino-Duo-H, two pieces on one side.
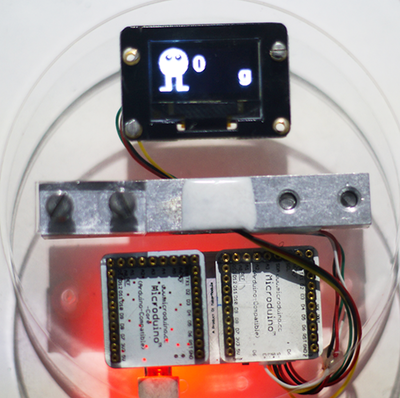
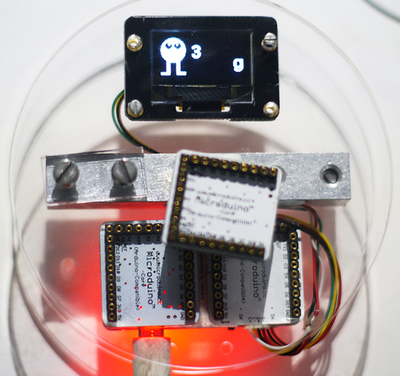
Use two long screws to fix the acrylic transparent plate which has been fixed with baseboard and the weighing electric bridge together, and focus on that there is a small rectangular gasket in the middle. Fix the other transparent acrylic board with two long screws and the gasket. Note:Align the gasket screw hole with the screw hole on the bridge, and then fix them. At this time supply power to the electronic scale, and wait for 1-2 second, then you can place items to weigh the weigh. Because it is the desktop scale, the weight is limited at about 2kg. Single Microduino module tips:According to the weight, the little man on the left will be pressed down. Program Instruction
unsigned long HX711_Read(void)	//Gain 128.
{
	unsigned long count;
	unsigned char i;

	digitalWrite(HX711_DT, HIGH);
	delayMicroseconds(1);

	digitalWrite(HX711_SCK, LOW);
	delayMicroseconds(1);

  	count=0;
  	while(digitalRead(HX711_DT));
  	for(i=0;i<24;i++)
	{
	  	digitalWrite(HX711_SCK, HIGH);
		delayMicroseconds(1);
	  	count=count<<1;
		digitalWrite(HX711_SCK, LOW);
		delayMicroseconds(1);
	  	if(digitalRead(HX711_DT))
		  count++;
	}
 	digitalWrite(HX711_SCK, HIGH);
	count ^= 0x800000;
	delayMicroseconds(1);
	digitalWrite(HX711_SCK, LOW);
	delayMicroseconds(1);

	return(count);
}
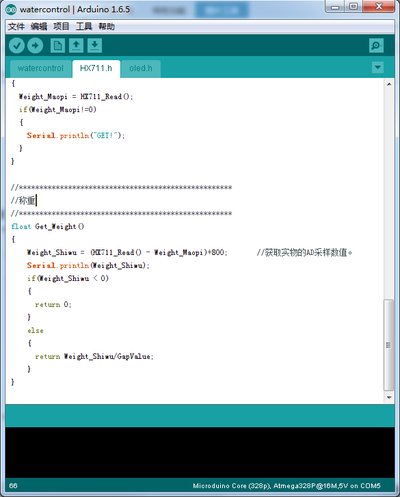
Weight-gaining function. float Get_Weight()
{
Weight_Shiwu = (HX711_Read() - Weight_Maopi)+800; //To get the AD sampling values of material objects.
Serial.println(Weight_Shiwu);
if(Weight_Shiwu < 0)
{
return 0;
}
else
{
return Weight_Shiwu/GapValue;
}
}video |

