Arithmetic Alarm Clock

From Microduino Wiki
Revision as of 01:28, 25 January 2016 by Admin (talk) (Created page with "{| style="width: 800px;" |- | ==Objective== Here we build an alarm clock. We adopt the joystick to set the clock, use the keys to set the system time and do arithmetic choice....")
(diff) ← Older revision | Latest revision (diff) | Newer revision → (diff)
Jump to: navigation, search

Objective

Here we build an alarm clock. We adopt the joystick to set the clock, use the keys to set the system time and do arithmetic choice.

Principle

Detect the rocker direction of the Joystick: In the Y-axis direction: Short press the upper key to increase the time and long press it to start or close the alarm clock. In the X-axis direction: Shake left to increase the time and shake right to decrease. When the alarm is closed, the key1 can set to increase the hour of the system time, the key2 can set to decrease that time, the key3 can set to increase the minute and the key4 can set to decrease the minute. The time setting for the key1, key2, key3 and key4 can be treated as the four choice questions of A, B, C and D when the alarm is started.

Equipment

Module Number Function
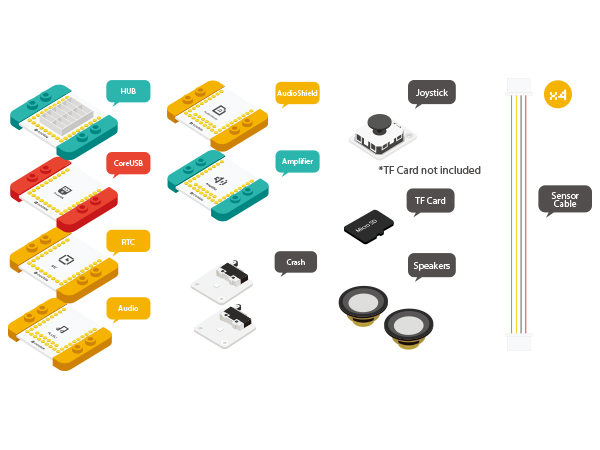
mCookie-CoreUSB 1 Core board
mCookie-Hub 1 Sensor pin board
mCookie-Audio 1 Audio module
mCookie-Amplifier 1 Amplifier module
mCookie-Shield 1 Audio extension module
mCookie-RTC 1 Time clock module
Microduino-Crash 2 Crash sensor
Microduino-Joystick 1 Rocker
  • Other Equipment:
    • Two loudspeakers
    • A USB cable
Music boxz alarm11 module.jpg

Hardware Buildup

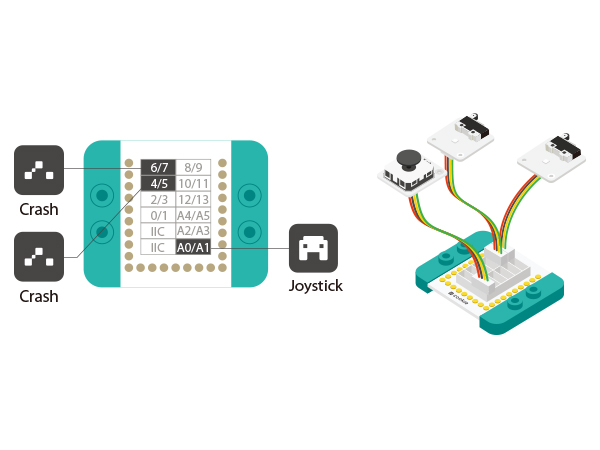
  • Setup1:Connect the two Crash sensors to the D4 and D6 pin of the Hub, and the Joystick to A0 and A1.
Music boxz 4 6—joystick.JPG
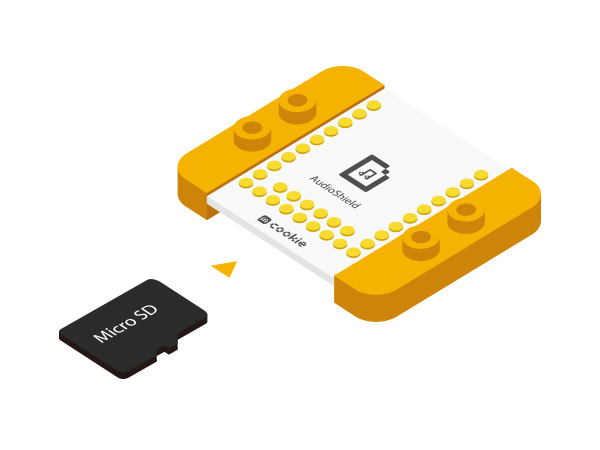
  • Setup 2:Insert the TF card into the slot of the AudioShield.
MusicBox Joystick TF.jpg
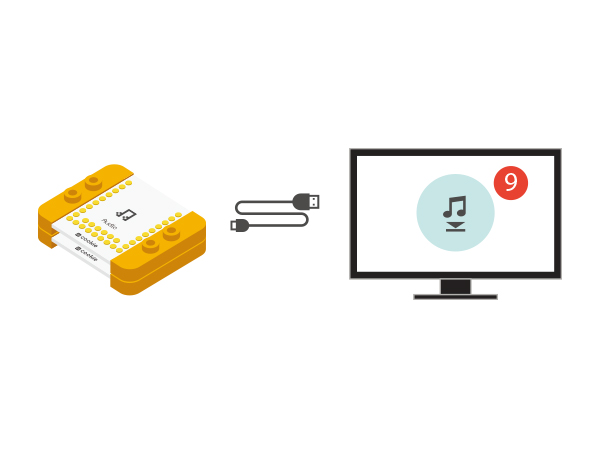
  • Setup 3:Stack the Audio and AudioShield together, connect them to the PC and you can play any MP3 files saved in the TF card.
MusicBox Joystick song.jpg
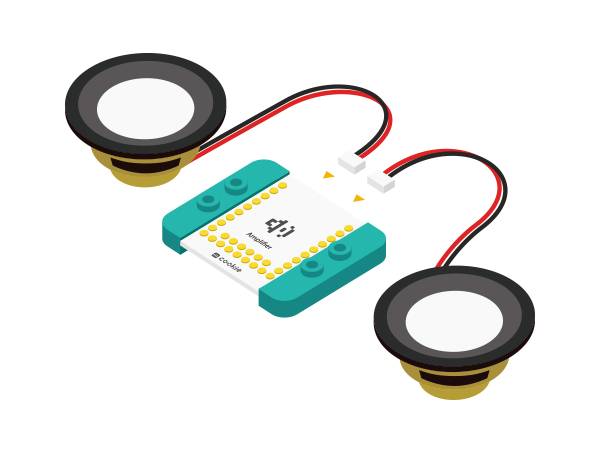
  • Setup4:Connect the two loudspeakers to the Amplifier.
MusicBox Joystick song speak.JPG
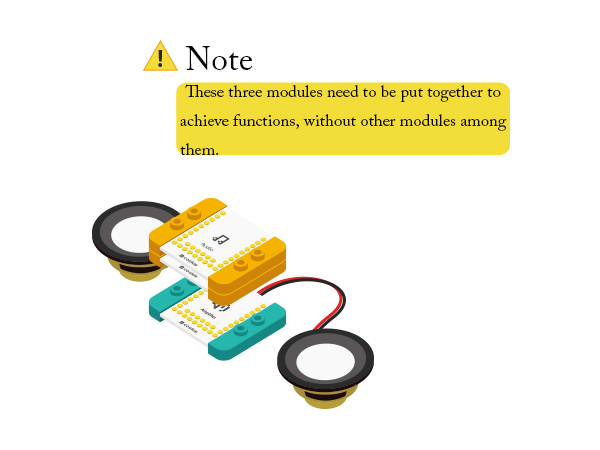
  • Setup5:Stack the Audio, AudioSheild and Amplifier.
MusicBox Joystick 3 speak.JPG
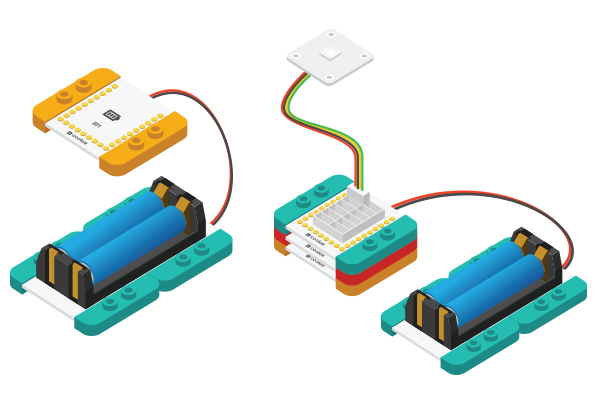
  • Setup6:Connect the activated battery box to the BM module.
CoreUSB Ble steup2.jpg
  • Setup7:Stack all modules freely(except the Audio, AudioShield and Amplifier should be next to each other) and complete the circuit buildup.

Code Download

File:Music clock-Calculation.zip

Code Description

  • " audio.h"--Audio play control.
  • oled.h-- Interface display
  • "key.h"-- Joystick and key detection.
  • "choose.h"--Key and joystick control function
  • Find "setRtcTime(15, 11, 13, 5, 17, 14, 00);" to set the time (Year, month, day, week, hour, minute and second). Please remove "//" download code before the setting, add "//" after that and download again or the system will reset the time when it starts after power-off.
    • Define the clock time in "choose.h". Users can change it according to personal needs.
int alarm_hour = 19;
int alarm_minute = 45;
  • Define "long press or short press" in the key, which can also be changed by users.
  • Set the alarm to ON and set it to play music when it meets the time.
  if (alarm)
  {
    if (alarm_switch == true)
      audio_play();
    else
      audio_pause();
  }
  • Generate choice questions randomly.
  if (!down && alarm_switch)
  {
    num_one = random(0, 100);
    num_two = random(0, 100);

    data_choose = random(0, 4);

    if (data_choose == 0)
    {
      num_data[0] = num_one + num_two;
      num_data[1] = num_one + num_two - 10;
      num_data[2] = num_one + num_two + 10;
      num_data[3] = num_one + num_two + 1;
    }
    if (data_choose == 1)
    {
      num_data[0] = num_one + num_two - 10;
      num_data[1] = num_one + num_two;
      num_data[2] = num_one + num_two + 10;
      num_data[3] = num_one + num_two - 1;
    }
    if (data_choose == 2)
    {
      num_data[0] = num_one + num_two + 10;
      num_data[1] = num_one + num_two - 10;
      num_data[2] = num_one + num_two ;
      num_data[3] = num_one + num_two - 1;
    }
    if (data_choose == 3)
    {
      num_data[0] = num_one + num_two + 10;
      num_data[1] = num_one + num_two - 10;
      num_data[2] = num_one + num_two + 1;
      num_data[3] = num_one + num_two;
    }
    down = true;
  }
  • If you do right of the choice question, the question will reduce one or it'll add one.
  if (key_num > 0)
  {
    if (key_num == data_choose + 1 )
    {
      onec_change -= 1;
      down = false;
    }
    else
      onec_change += 1;
  }

Result

You can set the time through the Crash sensor and set the alarm clock through the joystick. Besides, you can build beautiful shell for this project with LEGOs since mCookie modules can be easily stacked with LEGO boards.

Video