Outline
- Project: Open Source WIFI Weather Station System.(ESP8266 connected to Blynk)
- Objective: To get temperature, humidity, light intensity and even PM2.5 data around you.
- Difficulty: Medium
- Project Time: 2 Hours
- Creator: Ray
Introduction:
- The station monitors temperature, humidity, light intensity and even PM2.5 (particulate matter) data around you.
- Display the sensor data on the OLED screen.
- The station can be synced with Blynk to upload sensor data.
- Access the data anytime using the Blynk app.
Bill of Material
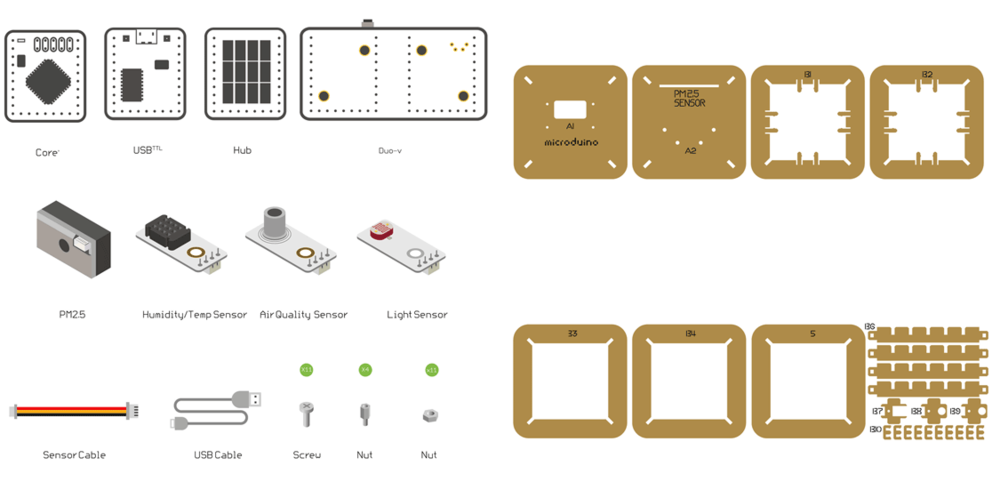
Microduino Equipment
Other Equipment
| Equipment |
Number |
Function
|
| Micro-USB cable |
1 |
For program download and power supply
|
| GP2Y1010AU0F |
1 |
PM2.5 sensor
|
| Screw |
7 |
Fixate modules
|
| Screwdriver |
1 |
Fixate screws
|
| Shell |
1 |
|
Principle of the Experiment
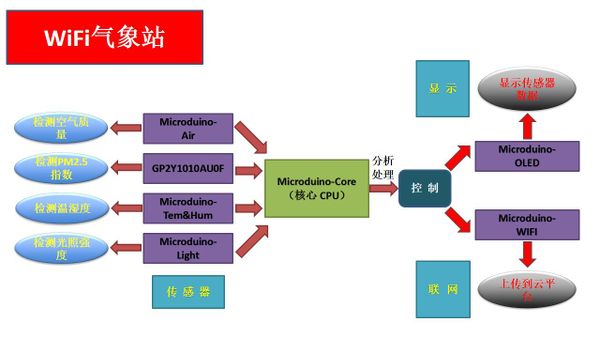
This Weather Station collects the following:
Get and Configure Blynk
Next, we'll learn how Microduino interacts with Blynk through the configuration process of the Weather Station.
Getting Started with Blynk
Add Configuration Items
- You can scan the two-dimension code below to get Weather Station APP.
- Also, you can make your own one.
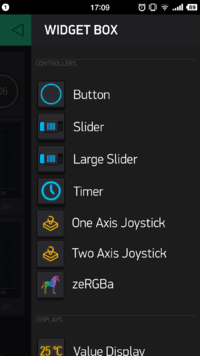
- In this case, you can click the panel and call out WIDGET BOX, on which you can see many choices.
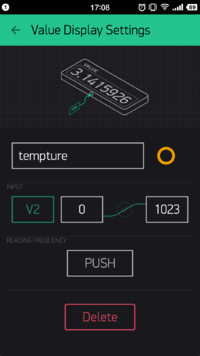
- Add Value Display item and name "temperature" to display Temperature value acquired.
- Select V2 on INPUT; Choose PUSH on READING FREQUENCY, which indicates the temperature is sent from the Weather Station and the frequency is controlled by Microduino Client.
The corresponding code at the Microduino Client is:
void senTempHumi() {
  am2321.read();
  float sensor_tem = am2321.temperature / 10.0;
  float sensor_hum = am2321.humidity / 10.0;
  Blynk.virtualWrite(V2, sensor_tem);
  Blynk.virtualWrite(V3, sensor_hum);

  oled(sensor_tem, sensor_hum, sensor_light, sensorPM25, Sensor_etoh);
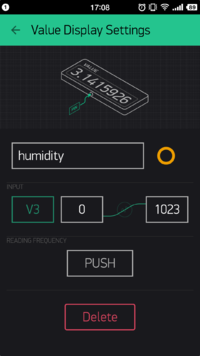
}- The setting of the humidity is similar with that of temperature; Set INPUT as V3 and send it through a timer function " senTempHumi()".
The frequency of the timer can be achieved by codes below:
void senTempHumi() {
  SimpleTimer temHumtimer;
  temHumtimer.setInterval(2000L, senTempHumi);
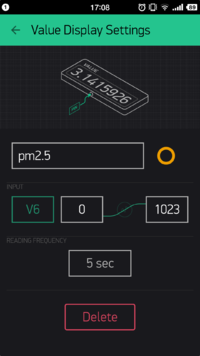
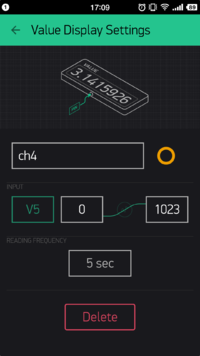
}- Set PM2.5's INPUT as V6, READING FREQUENCY as 5s, which represents frequency of the acquired PM2.5 data.
The corresponding code at the Microduino Client is:
BLYNK_READ(V6) {
  Blynk.virtualWrite(V6, sensorPM25);
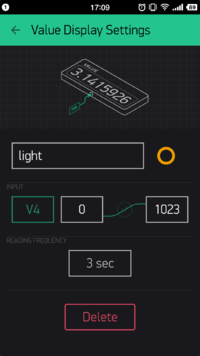
}- Similarly, set the INPUT of the Light Sensor as V4 and the frequency is to get value every 3s.
The corresponding code at the Microduino Client is:
BLYNK_READ(V4) {
  sensor_light = map(analogRead(A0), 0, 1023, 0, 255);
  Blynk.virtualWrite(V4, sensor_light);
}- The INPUT of the methane gas is V5 and the frequency is to get value every 5s.
The corresponding code at the Microduino Client is:
BLYNK_READ(V5) {
  Sensor_etoh= map(analogRead(A2), 0, 1023, 0, 30);
  Blynk.virtualWrite(V5, Sensor_etoh);
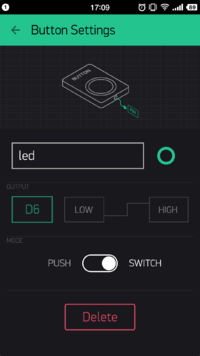
}- See "Button Setting" next.
- Set OUTPUT as V6 and MODE as SWITCH, meaning each time you press the button, you can switch electric level of the D6 pin at the Microduino Client.
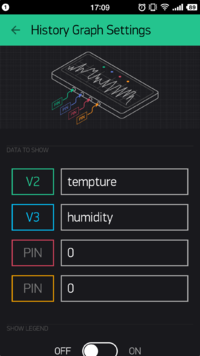
- For more intuitive data display, you can add one or more History Graph.
- Can be set as data graph displaying V2 and V3. (can achieve four data display at most.)
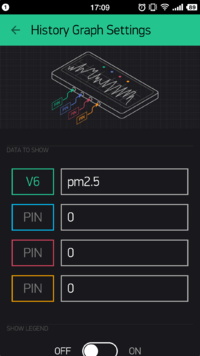
- The second History Graph can be used for displaying V6, PM2.5.
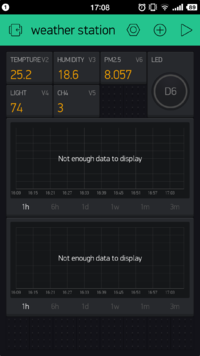
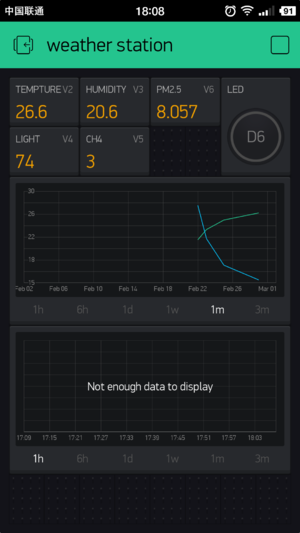
- Finally, your phone panel turns into this:
Program Download
Weather Station Code: ESP8266BlynkWeatherStation
Programming
- Stack Microduino-Core+ and Microduino-USBTTL together.
- Connect Microduino-USBTTL for program uploading with a USB cable.
- Attention: Please upload programs before stacking all modules together.
- Open Arduino IDE for Microduino development environment. (Please refer to: AVR Core:Getting started)
- Click 【Tool】, make sure the right board card(Microduino-Core+) and processor(Atmega644pa@16M,5V), select the corresponding port (COMX) .
- Click【File】->【Open】, scan to the program address, click “ESP8266BlynkWeatherStation.ino” and open it.
- After that, please click the button "→" to upload programs to the development board.
Hardware Buildup
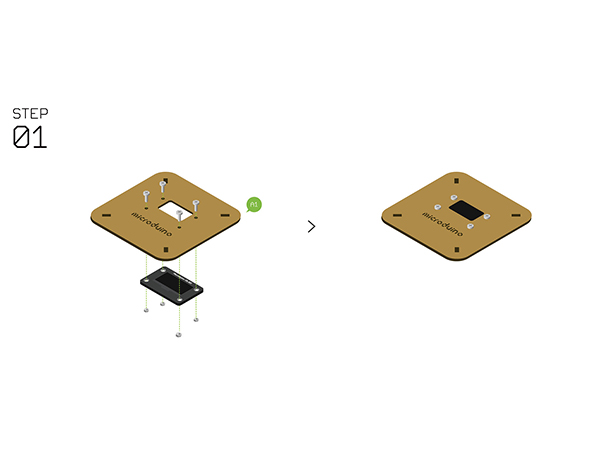
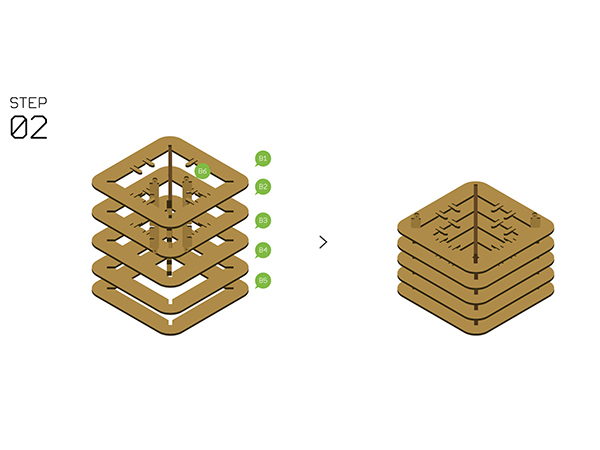
- Step2
- Assemble Structure-B1~B5 with Structure-B6.
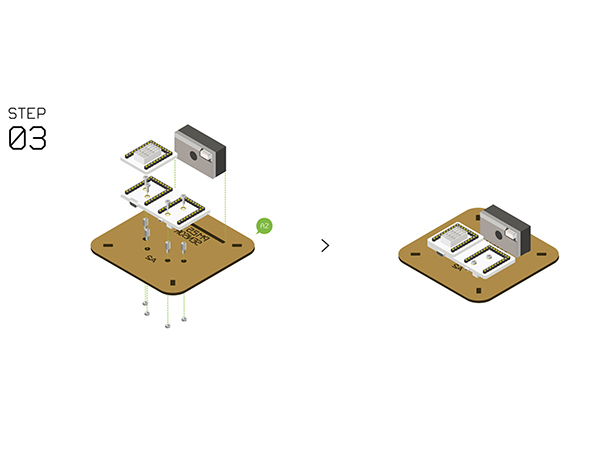
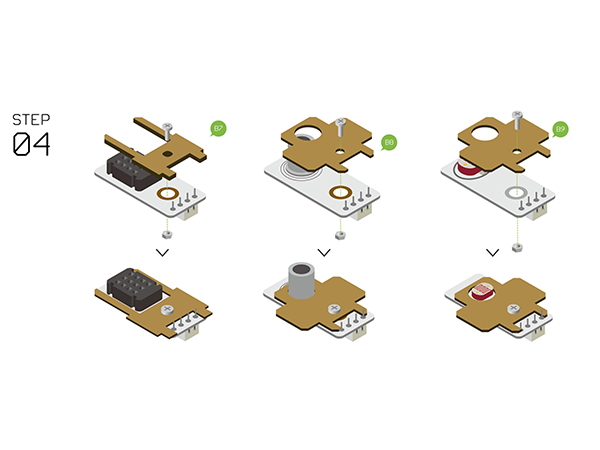
- Step4
- Assemble the following sensors with Structure-B7, B8, B9.
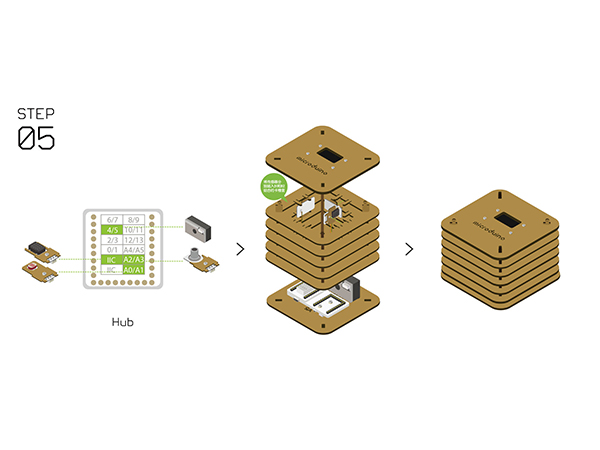
- Step5
- Connect the sensors below to Microduino-Sensorhub.
- Refer to the picture below, stack all sensors on the slot of Structure-B1 and Structure-B2.
- After that, connect Structure-A1 and Structure-A2 at the top and bottom of the system respectively.
- Step6
- Complete the steps above, then fixate with Structure-B0 and plug in a USB cable. Congratulations! You just finished the buildup of the Weather Station.
- Step7
- You can see sensor data on Microduino-OLED after setting.
- At the same time, you can also see uploaded data of the Weather Station on your phone Blynk.
Notes
- Please make sure the verification code is configured right.
- Make sure your router runs normally, the SSID and password are correct.
|
