Lesson 3--Microduino Digital voltmeter
| Language: | English • 中文 |
|---|
ObjectiveThis tutorial involves two new content, the use of Microduino serial port communication and analog port. We have introduced analog port in before lessons. It can measure 0 to 5 v voltage, then return the corresponding value of 0-1024. Today we will use this functionality to create a 0 to 5V voltage meter. Note:This experiment circuit without relatively complex protection circuit, so, don't use more than two AA batteries, and don't used to measure the lithium battery or other power supply!! Equipment
SchematicProgram /*
Usage:Introduce how to use Microduino analog port to measuer voltage
*/
float temp; //Define a float type variable to store the data
void setup()
{
Serial.begin(9600);
}
void loop()
{
int V1 = analogRead(A0);
//Read the data from A0 and store into V1. The measure scope is 0 ~5V, and return value is 0-1024
float vol = V1*(5.0 / 1023.0);
//Converthe V1 to actual voltage and the store into variable vol
if (vol == temp)
//This part used to filter repeat data, only output when value is different between two measure
{
temp = vol; //After compared, save the value to temp
}
else
{
Serial.print(vol); //Serial output voltage and no newline
Serial.println(" V"); //Serial output voltage with a newline
temp = vol;
delay(1000); //Wait for 1s to refresh
}
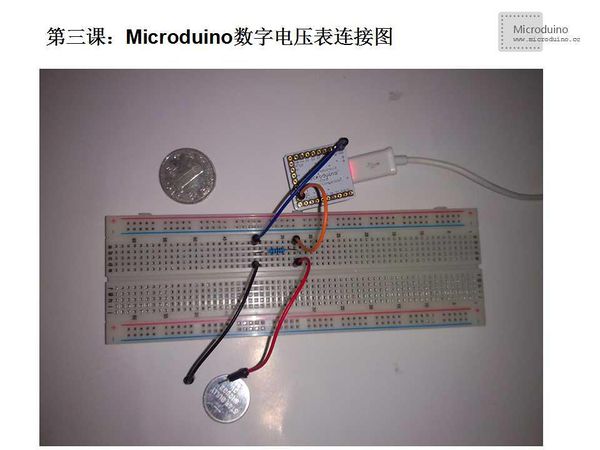
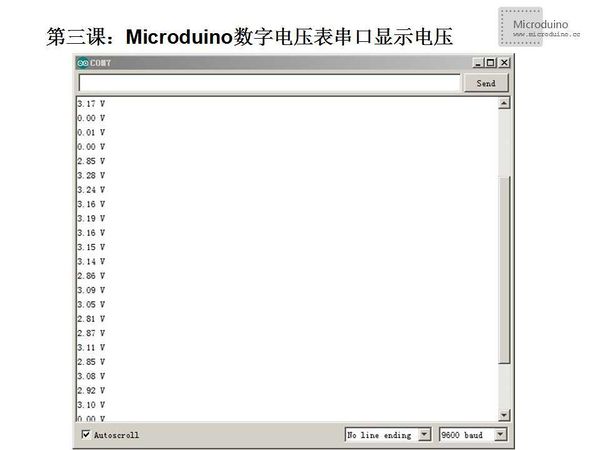
}DebugStep 1:Copy the code to IDE and compile it Step 2:Connect the circuit, as follows: The purpose of using 1K resistor is that in the case of measuring end vacant, lead the GND reference level to measure port, to avoid interference vacant interfaces. Step 3:Run program Step 4:Placed the red line and black line to object's positive, negative terminal, in this case, it is a button battery, serial will display voltage value. ResultThe red line connects to positive terminal and black line connects to negative termianl, serial monitor will show the voltage value with 1s refresh speed. The value will be change, because this is a low accuracy test. Video |


