Difference between revisions of "Sensor-Air Quality"
From Microduino Wiki
(→Introduction of Sensor Pins) |
|||
| (6 intermediate revisions by one other user not shown) | |||
| Line 6: | Line 6: | ||
The product number of Sensor-Air is: '''MSDT61''' | The product number of Sensor-Air is: '''MSDT61''' | ||
| + | |||
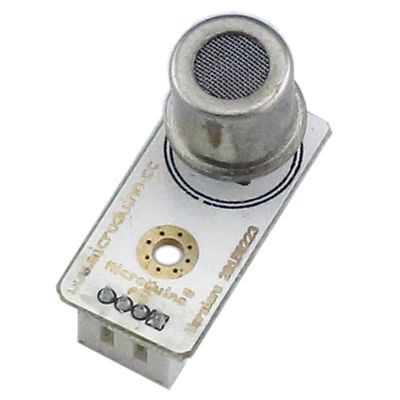
Sensor-Air is an air quality sensor module. | Sensor-Air is an air quality sensor module. | ||
| − | + | TP401T air quality sensor shows great sensitivity towards alcohol, cigarettes, ammonia, sulfide and other pollution sources. | |
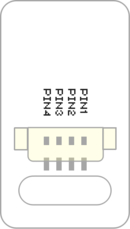
==Introduction of Sensor Pins== | ==Introduction of Sensor Pins== | ||
| − | {{ | + | {{ST_Pinout |
| − | | | + | |st_name=Air Quality Sensor |
| − | | | + | |pin3=Analog Input |
| − | |||
}} | }} | ||
| − | |||
==Features== | ==Features== | ||
| Line 24: | Line 23: | ||
*Sensitive for air pollution. | *Sensitive for air pollution. | ||
*long product life and low price | *long product life and low price | ||
| − | *Easy to use | + | *Easy to use |
==Specification== | ==Specification== | ||
| − | * | + | *Sensor voltage |
| − | ** | + | **3.3V~5V working voltage |
| − | ** | + | |
| − | * | + | *Sensor size |
| − | ** | + | **Size of the board: 23.5mm*13mm |
| + | **1.27mm-spacing 4Pin interface connected to sensorhub | ||
| + | **The CAD drawing of the sensor: '''[[File:Sensor_CAD.zip]]''' | ||
| + | |||
| + | *Technical parameters | ||
| + | **Range: 1-100ppm | ||
**Sensitivity: 0.15-0.45ppm | **Sensitivity: 0.15-0.45ppm | ||
| − | + | ||
| − | + | *Connection | |
| − | + | **This sensor can be connected to the following interface of core: '''A0~A7''' | |
| − | |||
| − | *Connection | ||
| − | ** | ||
| − | |||
| − | |||
| − | |||
==Document== | ==Document== | ||
| − | *Schematic diagram: '''[[File: | + | *Schematic diagram: '''[[File: Sensor-Air Quanlity.Zip]]''' |
| + | *Main chip: '''[[File: TP401T_datasheet.pdf ]]''' | ||
==Development== | ==Development== | ||
| − | === | + | ===Program Download=== |
| − | * | + | *Download and unzip the program: '''[[File:Sensor-Air Quality_Test.zip]]''' |
| − | + | ||
| − | + | ===Programming=== | |
| − | + | {{Upload | |
| − | = | + | |nameA=[[Microduino-Core]], [[Microduino-USBTTL]] |
| − | + | |nameB=[[Microduino-USBTTL]] | |
| − | + | |boardName=Microduino/mCookie-Core(328p), Atmega328P@16M,5V | |
| − | + | |fileName=Sensor-Air Quality Test.ino | |
| − | + | }} | |
| − | ===Hardware | + | |
| − | * | + | ===Hardware Setup=== |
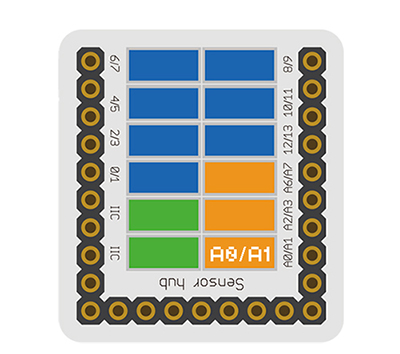
| − | + | *Referring to the following diagram, connect the Sensor-AirQulity to analog pin A0/A1 of '''[[Microduino-Sensorhub]]'''. | |
| − | [[file:Microduino- | + | <br> |
| − | + | [[file:Microduino-sensorhub_Moisture.JPG|thumb|400px|left]] | |
| − | + | <br style="clear: left"/> | |
| − | * | + | ===Result=== |
| − | + | *After download, open the serial monitor. | |
| − | + | *The current air quality value will be printed out in cycle in the serial monitor. | |
| − | |||
| − | * | ||
==Application== | ==Application== | ||
| Line 82: | Line 79: | ||
*Front | *Front | ||
| − | [[file: Microduino-AirQuality-F.JPG|thumb|600px|center| | + | [[file: Microduino-AirQuality-F.JPG|thumb|600px|center|Sensor-Light Front]] |
*Back | *Back | ||
| − | [[file: Microduino-AirQuality-b.JPG|thumb|600px|center| | + | [[file: Microduino-AirQuality-b.JPG|thumb|600px|center|Sensor-Light Back]] |
|} | |} | ||
Latest revision as of 23:14, 30 March 2017
| Language: | English • 中文 |
|---|
|
The product number of Sensor-Air is: MSDT61 Sensor-Air is an air quality sensor module. TP401T air quality sensor shows great sensitivity towards alcohol, cigarettes, ammonia, sulfide and other pollution sources.
ContentsIntroduction of Sensor Pins
Features
Specification
Document
DevelopmentProgram Download
Programming
Hardware Setup
Result
ApplicationAir cleaner, air conditioner and fresh air detector. ProjectPurchaseHistoryPictures
File:Microduino-AirQuality-F.JPG Sensor-Light Front
File:Microduino-AirQuality-b.JPG Sensor-Light Back |


