Outline
- Project: Open Source WIFI Weather Station System.(ESP8266 connected to Blynk)
- Objective: To get temperature, humidity, light intensity and PM2.5 at the weather station.
- Note: PM2.5 refers to atmospheric particulate matter (PM) that have a diameter of less than 2.5 micrometers
- Difficulty: Medium
- Time-consuming: 2-Hour
- Maker: Ray
Introduction:
- Read temperature, humidity, light intensity and PM2.5 data and display those data on the screen.
- Upload the data to Blynk.
- View data on phone anywhere using the Blynk app.
- Created by Microduino with Microduino components.
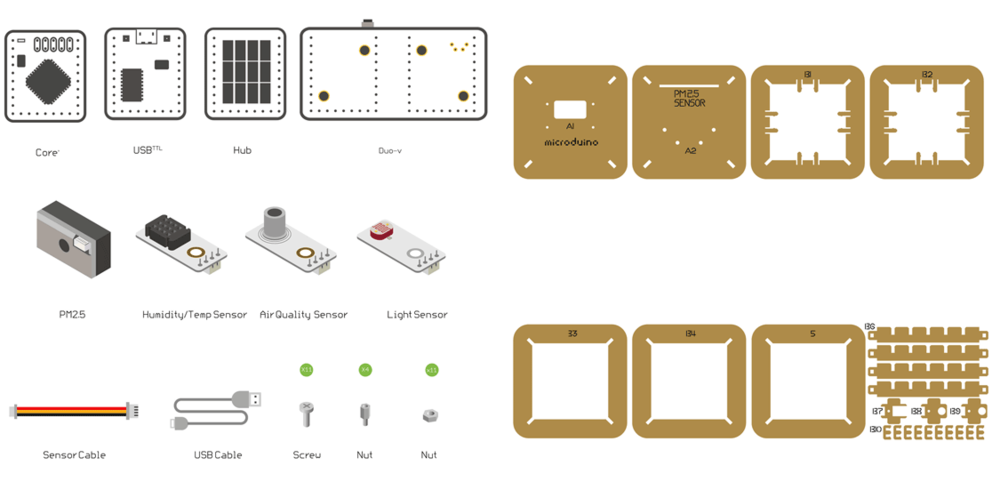
Bill of Material
Microduino Equipment
| Note: Different revisions may contain different components.
|
Other Equipment
| Equipment |
Number |
Function
|
| Micro-USB cable |
1 |
For program download and power supply
|
| GP2Y1010AU0F |
1 |
PM2.5 sensor
|
| Screw |
7 |
Fixate modules
|
| Screwdriver |
1 |
Fixate screws
|
| Shell |
1 |
|
Note: Different revisions will contain different components. Most noteable are:
- Duo-V will be replaced with a Microduino-Cube-S1 .
- Humidity/TempSensor will be replaced with a Tem&Hum-S2.
|
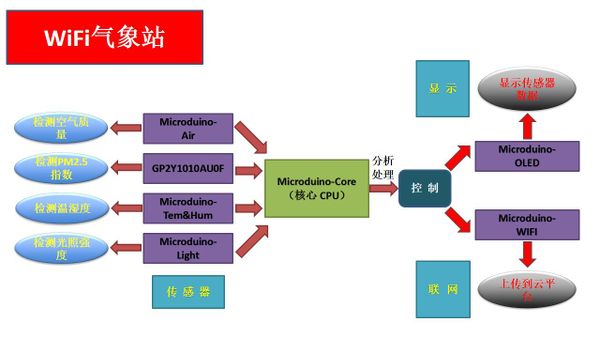
Principle of the Experiment
This Weather Station can detect data including:
Get and Configure Blynk
Next, we'll learn how Microduino interacts with Blynk through the configuration process of the Weather Station.
Get Blynk Phone Client
Add Configuration Items
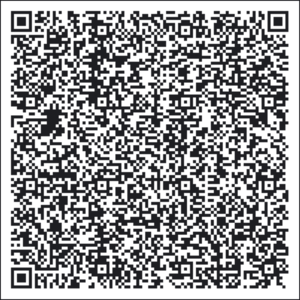
- You can scan the two-dimension code below to get Weather Station APP.
|
|
- Also, you can make your own one.
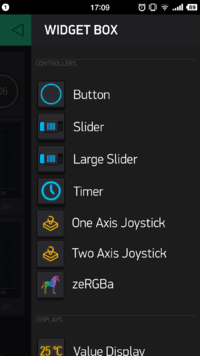
- In this case, you can click the panel and call out WIDGET BOX, on which you can see many choices.
|
|
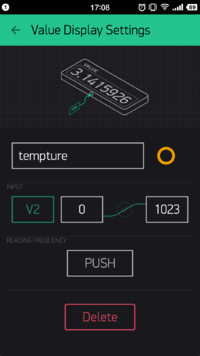
- Add Value Display item and name "temperature" to display Temperature value acquired.
- Select V2 on INPUT; Choose PUSH on READING FREQUENCY, which indicates the temperature is sent from the Weather Station and the frequency is controlled by Microduino Client.
|
|
|
The corresponding code at the Microduino Client is:
|
void senTempHumi() {
  am2321.read();
  float sensor_tem = am2321.temperature / 10.0;
  float sensor_hum = am2321.humidity / 10.0;
  Blynk.virtualWrite(V2, sensor_tem);
  Blynk.virtualWrite(V3, sensor_hum);

  oled(sensor_tem, sensor_hum, sensor_light, sensorPM25, Sensor_etoh);
} |
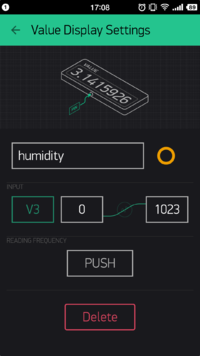
- The setting of the humidity is similar with that of temperature; Set INPUT as V3 and send it through a timer function " senTempHumi()".
|
|
- The frequency of the timer can be achieved by codes below:
|
void senTempHumi() {
  SimpleTimer temHumtimer;
  temHumtimer.setInterval(2000L, senTempHumi);
} |
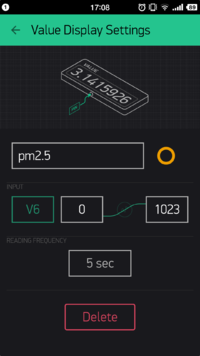
- Set PM2.5's INPUT as V6, READING FREQUENCY as 5s, which represents frequency of the acquired PM2.5 data.
|
|
- The corresponding code at the Microduino Client is:
|
BLYNK_READ(V6) {
  Blynk.virtualWrite(V6, sensorPM25);
} |
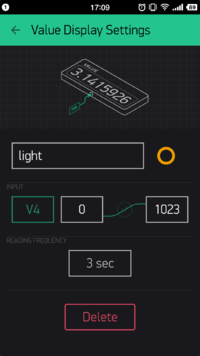
- Similarly, set the INPUT of the Light Sensor as V4 and the frequency is to get value every 3s.
|
|
- The corresponding code at the Microduino Client is:
|
BLYNK_READ(V4) {
  sensor_light = map(analogRead(A0), 0, 1023, 0, 255);
  Blynk.virtualWrite(V4, sensor_light);
} |
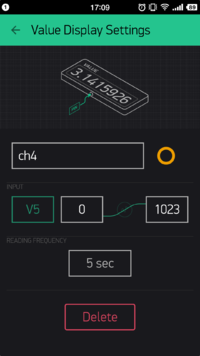
- The INPUT of the methane gas is V5 and the frequency is to get value every 5s.
|
|
- The corresponding code at the Microduino Client is:
|
BLYNK_READ(V5) {
  Sensor_etoh= map(analogRead(A2), 0, 1023, 0, 30);
  Blynk.virtualWrite(V5, Sensor_etoh);
} |
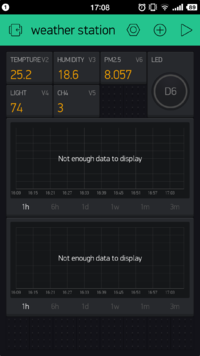
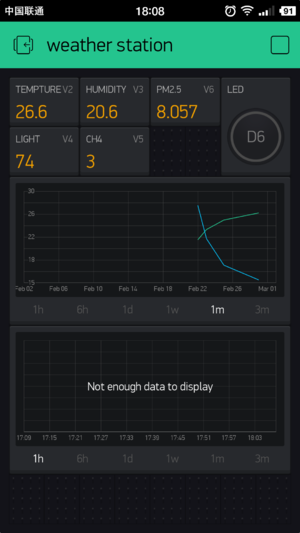
- Finally, your phone panel turns into this:
|
|
Program Download
Weather Station Code: ESP8266BlynkWeatherStation
Programming
- Stack Microduino-Core+ and Microduino-USBTTL together.
- Connect Microduino-USBTTL for program uploading with a USB cable.
- Attention: Please upload programs before stacking all modules together.
- Open Arduino IDE for Microduino development environment. (Please refer to: AVR Core:Getting started)
- Click 【Tool】, make sure the right board card(Microduino-Core+) and processor(Atmega644pa@16M,5V), select the corresponding port (COMX) .
- Click【File】->【Open】, scan to the program address, click “ESP8266BlynkWeatherStation.ino” and open it.
- After that, please click the button "→" to upload programs to the development board.
Hardware Buildup
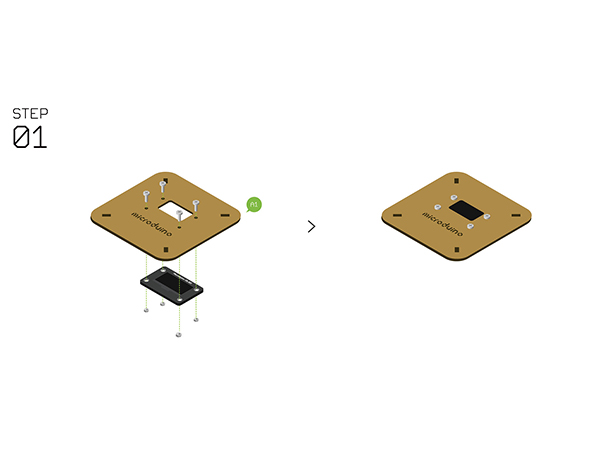
- Step2
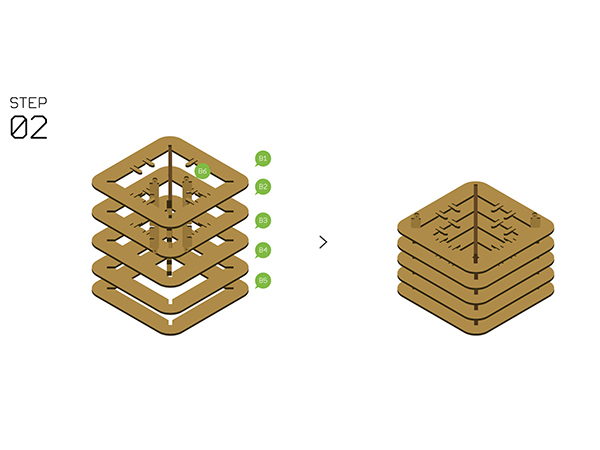
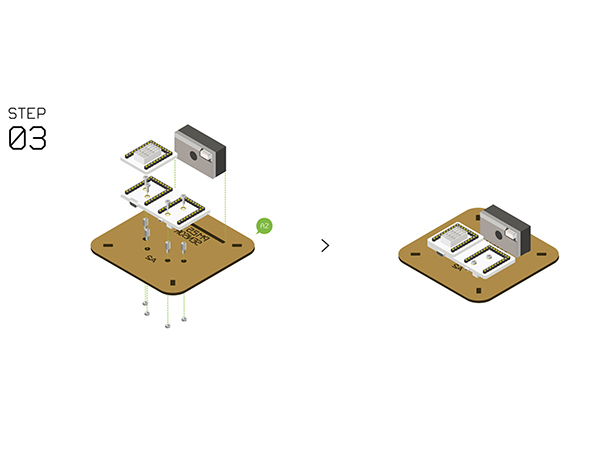
- Assemble Structure-B1~B5 with Structure-B6.
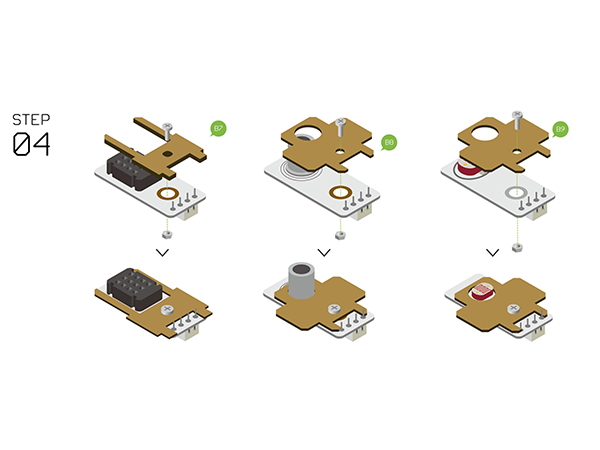
- Step4
- Assemble the following sensors with Structure-B7, B8, B9.
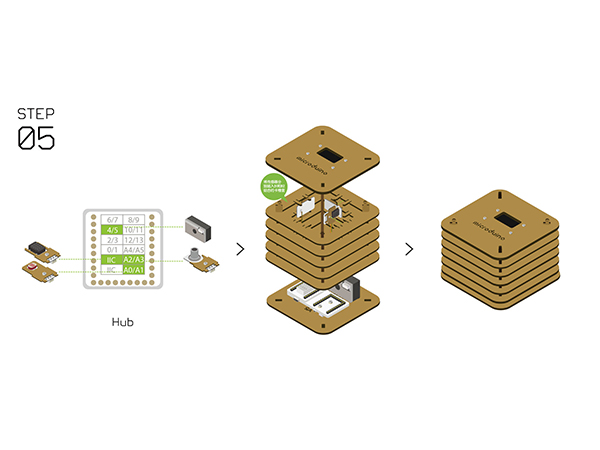
- Step5
- Connect the sensors below to Microduino-Sensorhub.
- Refer to the picture below, stack all sensors on the slot of Structure-B1 and Structure-B2.
- After that, connect Structure-A1 and Structure-A2 at the top and bottom of the system respectively.
- Step6
- Complete the steps above, then fixate with Structure-B0 and plug in a USB cable. Congratulations! You just finished the buildup of the Weather Station.
- Step7
- You can see sensor data on Microduino-OLED after setting.
- At the same time, you can also see uploaded data of the Weather Station on your phone Blynk.
Notes
- Please make sure the verification code is configured right.
- Make sure your router runs normally, the SSID and password are correct.
|
