Difference between revisions of "Open Source WiFi Weather Station"
From Microduino Wiki
(→Using the Blynk App) |
(→Programming the Weather Station) |
||
| Line 144: | Line 144: | ||
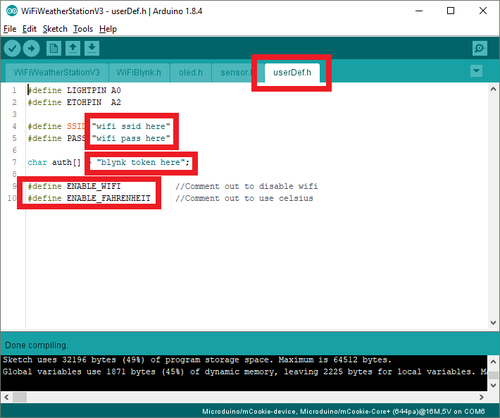
**'''PASS''' (WiFi password) | **'''PASS''' (WiFi password) | ||
**'''auth''' key as noted earlier in the Blynk app sent to you via e-mail. | **'''auth''' key as noted earlier in the Blynk app sent to you via e-mail. | ||
| + | :::[[File:Wws_configuration.png|500px]] | ||
*Click on the '''upload button''' (right arrow icon on the top left) to upload the program. | *Click on the '''upload button''' (right arrow icon on the top left) to upload the program. | ||
*The program will compile and upload. Once completed a upload successful message will appear on the bottom left. | *The program will compile and upload. Once completed a upload successful message will appear on the bottom left. | ||
Revision as of 02:33, 19 December 2018
Contents[hide]Outline
Introduction:
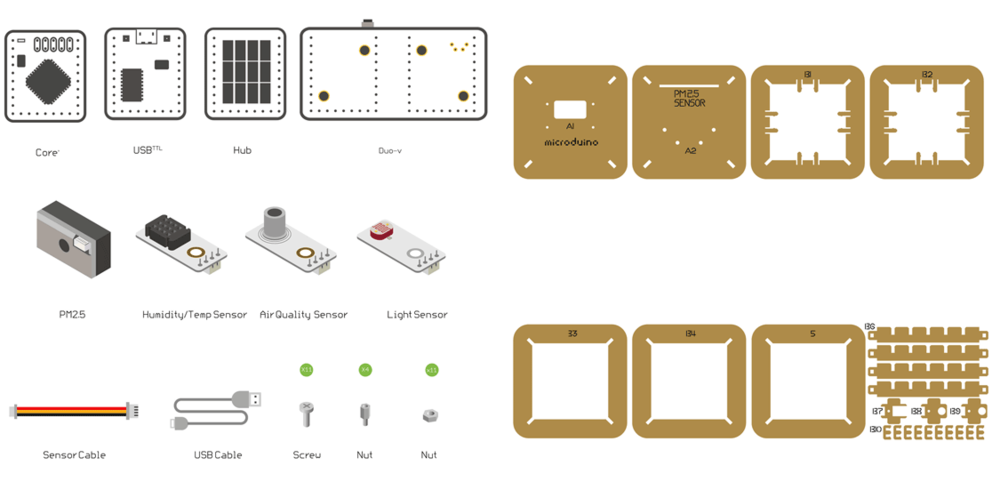
Bill of MaterialMicroduino Equipment
Other Equipment
Principle of the ExperimentThis Weather Station can detect data including:
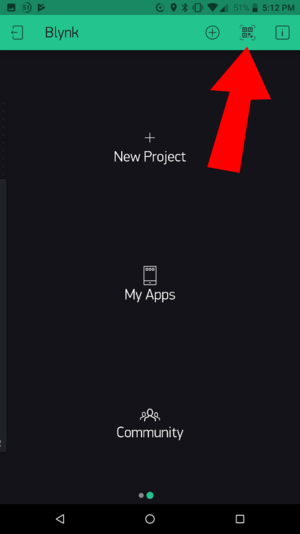
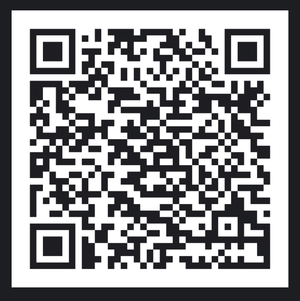
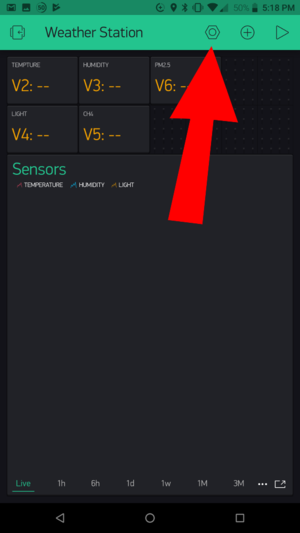
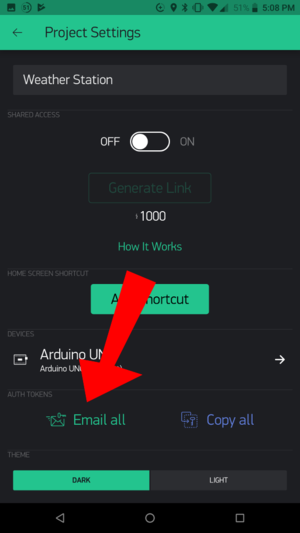
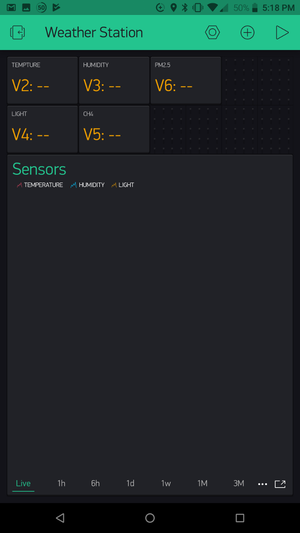
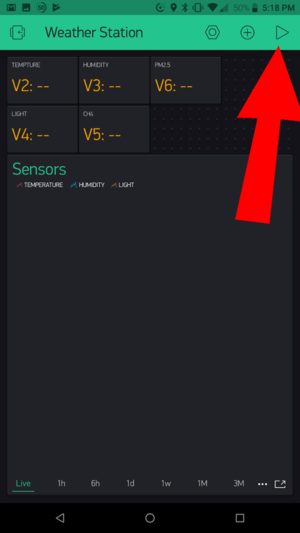
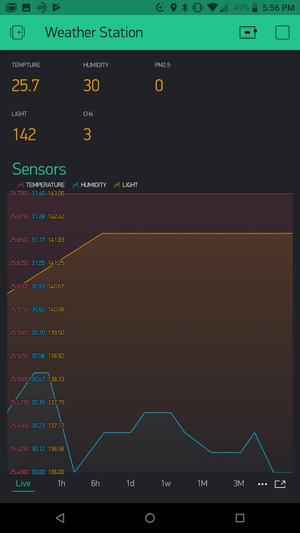
Get and Configure BlynkNext, we'll learn how Microduino interacts with Blynk through the configuration process of the Weather Station. Download the Blynk AppVisit the Google Play Store or the Apple App Store and download the Blynk app. You'll need to setup an account with Blynk before proceeding. Please use a valid e-mail as your authentication tokens will be sent to that e-mail. Using the Blynk App
ProgrammingSoftware SetupPlease follow the guide to ensure your software is correctly setup. The software is required to program the WiFi Weather Station. Download the latest software for your operating system and follow the getting started guides: Programming the Weather Station
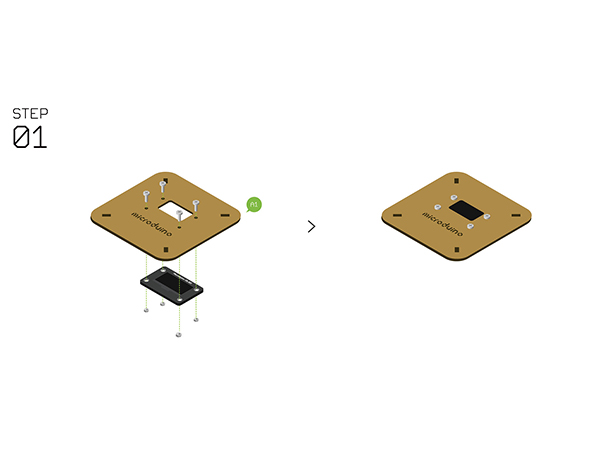
Hardware BuildupStep 1
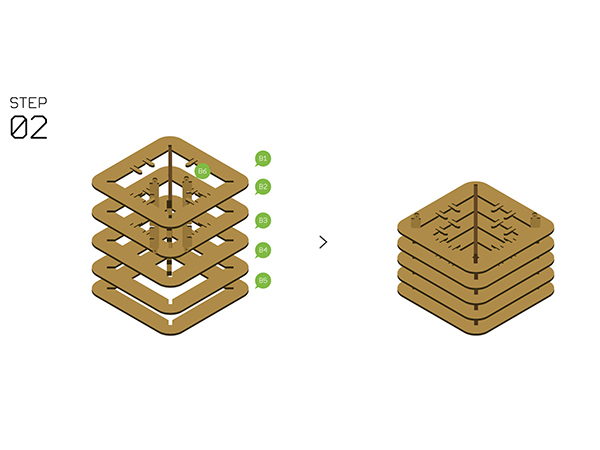
Step 2
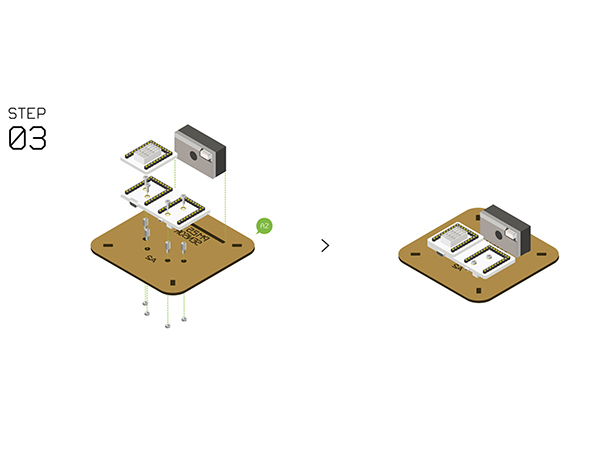
Step 3
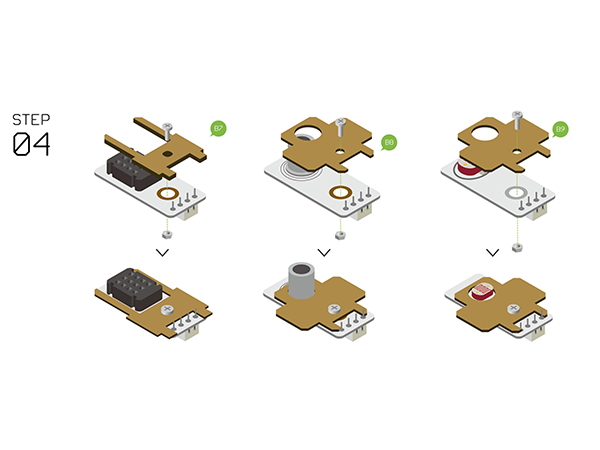
Step 4
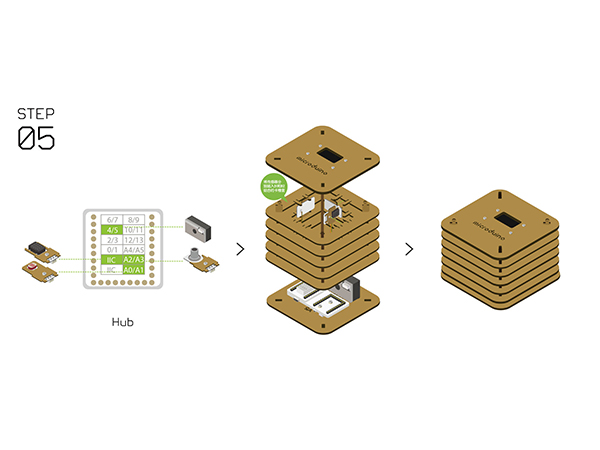
Step 5
Step 6
Step 7
Step 8
Notes
|
