Difference between revisions of "Sensor-IR Sensor"

From Microduino Wiki
Jump to: navigation, search
(Document)
(Development)
Line 45: Line 45:
  
 
==Development==
 
==Development==
===Preparation===
+
===Program Download===
*Confirm that you has set up the development environment of Microduino, otherwise please refer to : [[Microduino Getting started]]
+
*Download and unzip the program '''[[File:Sensor-IR Sensor_Test.zip]]'''
*Core choose
 
**1.Adopt [[Microduino-CoreUSB]] or [[mCookie-CoreUSB]] as the core directly.
 
**2.Adopt [[Microduino-Core]] or [[Microduino-Core+]], and you also need [[Microduino-USBTTL]] to download program.
 
===Program===
 
*Open the program "IRsendDemo" in the library.
 
[[file:mCookie-IRsendDemo.JPG|thumb|800px|center]]
 
*include <IRremote.h>      Call the infrared library function.
 
*IRsend irsend;      Define the infrared sending object.
 
*irsend.sendSony(0xa90, 12);    Send the infrared coding.
 
  
 +
===Programming===
 +
{{Upload
 +
|nameA=[[Microduino-Core]], [[Microduino-USBTTL]]
 +
|nameB=[[Microduino-USBTTL]]
 +
|boardName=Microduino/mCookie-Core(328p), Atmega328P@16M,5V
 +
|fileName=Sensor-IR-Sensor Test.ino
 +
}}
  
 
===Hardware Setup===
 
===Hardware Setup===
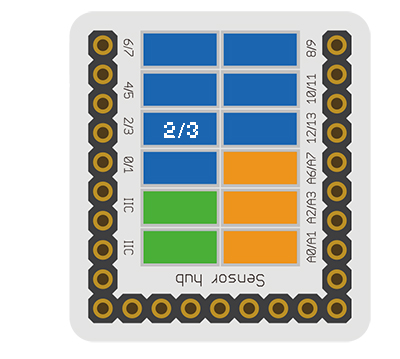
*Stack all modules together, and connect the interface on the back of IR-transmitter and the digital port (D3) of Sensorhub with dupont line.
+
*Referring to the following diagram, connect the Sensor-IR Sensor to digital pin D3 of '''[[Microduino-Sensorhub]]'''.
[[Microduino-Sensorhub]]
+
<br>
[[file:Microduino-sensorhub_D3.PNG|thumb|400px|center]]
+
[[file:Microduino-sensorhub__IR-transmitter.JPG|thumb|400px|left]]
[[mCookie-Hub]]
+
<br style="clear: left"/>
[[file:mCookie-sensorhub_D3.PNG|thumb|400px|center]]
+
 
*Connect Sensorhub with LED, and connect them to the computer with USB cable.
+
===Result===
*Select the right board card and COM port, and download directly after compiling. You can refer to[[AVR Core: Getting Started]]
+
*After download, you can open the serial monitor.  
[[file:upload.JPG|thumb|800px|center]]
+
*Input a random value on the serial monitor, and you will see the LED on IR Sensor flash once, representing the IR signal has been sent.
*Open Arduino IDE, choose File→Examples→Microcuino→Sensor_IRremote→IRsendDemo the sample program, select the right board card in Tools→Board, and then compile.
 
*After compiling, choose the right port in Tools→Serial Port of Arduino IDE, adn then download the program directly.  
 
*After downloading, you can open the serial monitor, and you can see the LED on IR emitter module twinkles once after input any value to the control panel, saying the infrared signal has been sent.


==Application==
 
==Application==

Revision as of 03:37, 10 November 2016

Language: English  • 中文
Sensor-IR-Sensor

The product number of Sensor-IR Sensor is: MSDI21

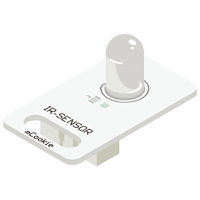
Sensor-IR Sensor is infrared emission sensor module.


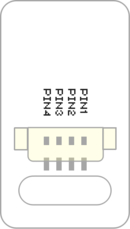
Instruction of Sensor Pin

Sensor backpin.png
  • Pins of the sensor:
    • PIN1: GND
    • PIN2: VCC
    • General signal pins:
      • PIN3(IO1): digital/analog signal
      • PIN4(IO2): NC(null)
    • Special signal pins:
      • If it is IIC: IO1/IO2 are respectively SDA/SCL.
      • If it is soft serial port: IO1/IO2 are respectively tx/rx.
  • Special to Sensor-IR Sensor sensor pins
    • PIN1: GND
    • PIN2: VCC
    • PIN3(IO1): Digital signal input(pwm)
    • PIN4(IO2): NC


Microduino sensor can communicate with core module through the connection with Microduino-Module Sensor Hub.

Features

  • With small power and high sensitivity.
  • With small size which is easy to install.

Specification

  • Voltage
    • 3.3V~5V working voltage
  • Size
    • Size of the board: 23.5mm*13mm
    • 1.27mm-spacing 4Pin interface connected with sensorhub
    • The CAD drawing of the sensor: File:Sensor CAD.zip
  • Technical parameter:
    • Infrared spectrum: 1~3 µm

Document

Development

Program Download

Programming

  • Follow the Software Getting Started Guide.
  • Select the Board, Processor and Port.
  • Click [File]->[Open], browse to the project program address, and click "Sensor-IR-Sensor Test.ino" to open the program.
  • After confirming all these items are correct, click "→" to download the program to the development board.

Hardware Setup

  • Referring to the following diagram, connect the Sensor-IR Sensor to digital pin D3 of Microduino-Sensorhub.


Microduino-sensorhub IR-transmitter.JPG


Result

  • After download, you can open the serial monitor.
  • Input a random value on the serial monitor, and you will see the LED on IR Sensor flash once, representing the IR signal has been sent.

Application

It can be used in infrared remote controller to control various household appliances. At first, you need to confirm the infrared signal type and the protocol format.


Projects

Purchase

History

Gallery

  • Front
Microduino-IR-transmitter Front
  • Back
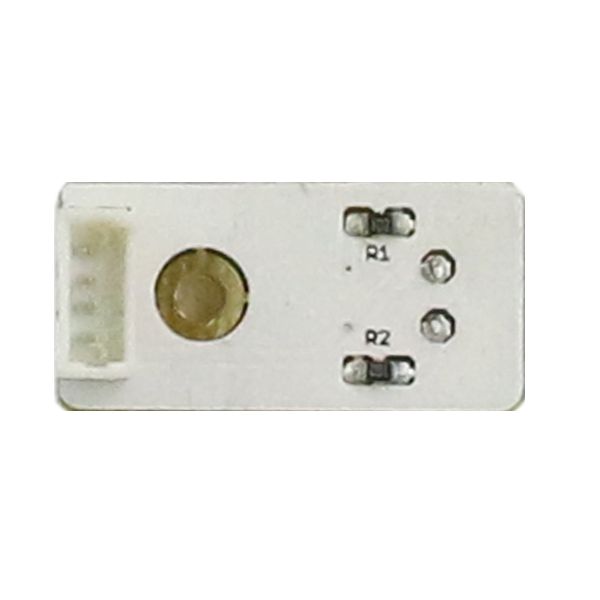
Microduino-IR-transmitter Back